1. Ynlieding
This manual provides detailed instructions for the installation, operation, and maintenance of the Rain Bird Replacement Solenoid Kit, Model 236239. This kit is designed for use with Rain Bird PGA, PEB, EFB-CP, BPE/BPES, and GB series irrigation valves. It includes the solenoid handle, the plunger/spring assembly, and an adapter assembly, facilitating the repair and replacement of existing solenoids.
2. Produkt Overview
The Rain Bird Replacement Solenoid Kit (Model 236239) is a critical component for maintaining the functionality of your irrigation system's valves. It ensures proper opening and closing of the valve, controlled by your irrigation controller.
2.1 Kit komponinten
- Solenoid Handle: Used for manual operation and attachment.
- Plunger/Spring Assembly: The core electromagnetic component responsible for valve actuation.
- Adapter Assembly: Connects the solenoid to the valve body.
2.2 Product Image
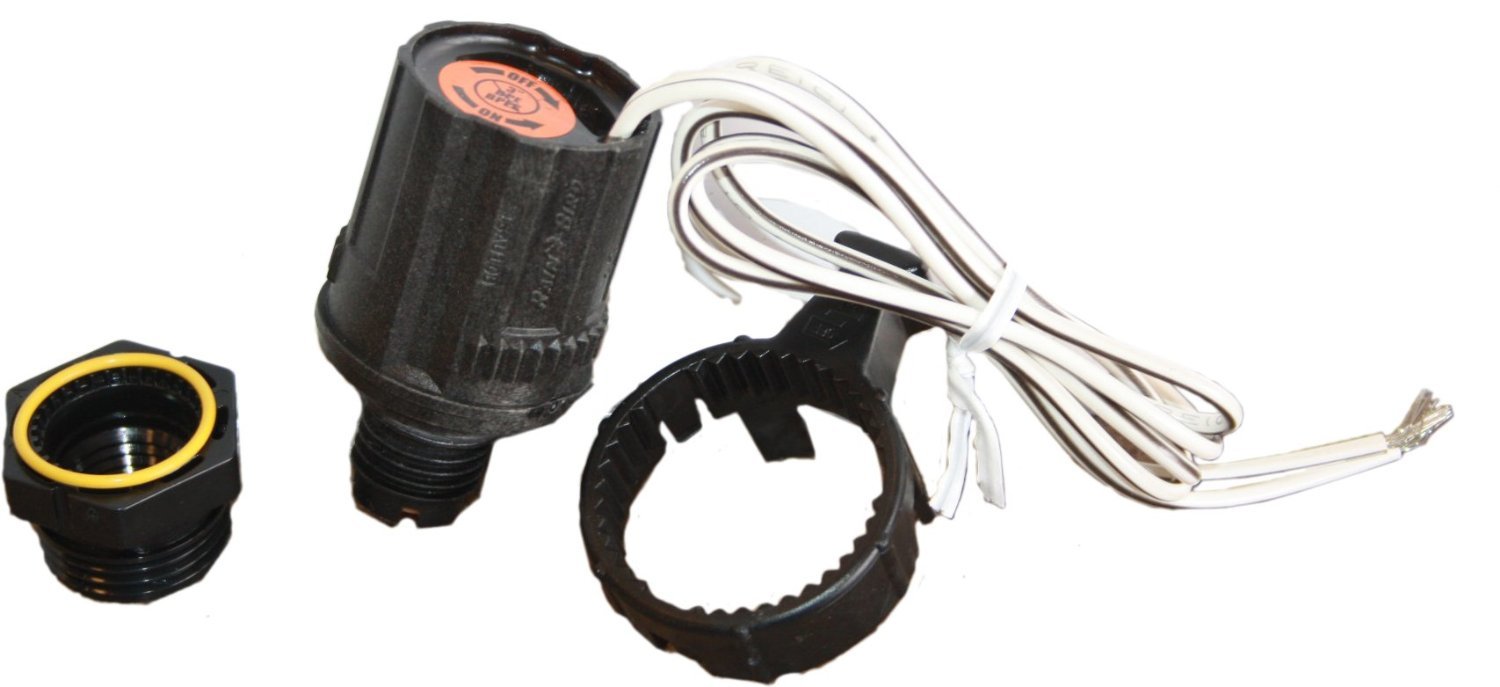
Image 1: Rain Bird Replacement Solenoid Kit. This image displays the complete kit, including the solenoid handle, plunger/spring assembly, and adapter assembly, ready for installation.
3. Opset en ynstallaasje
Before beginning installation, ensure the main water supply to the irrigation system is turned off to prevent water flow and potential injury. Gather necessary tools such as a screwdriver and wire strippers.
3.1 Replacing the Solenoid
- Wetterfoarsjenning ôfslute: Locate and close the main shut-off valve for your irrigation system.
- Sykje de fentyl: Identify the irrigation valve requiring solenoid replacement.
- Ferbine wiring: Carefully disconnect the two wires leading to the old solenoid. Note which wire connects to the common wire (usually white) and which connects to the zone wire.
- Alde solenoïde fuortsmite: Unscrew the old solenoid from the valve body by turning it counter-clockwise. Be prepared for a small amount of water to escape.
- Inspect Valve: Check the valve body for any debris or damage. Clean if necessary.
- Nije solenoïde ynstallearje: Screw the new Rain Bird solenoid (Model 236239) into the valve body clockwise until hand-tight. Do not overtighten.
- Ferbine wiring: Connect the two wires from the new solenoid to the irrigation system's common and zone wires. It does not matter which solenoid wire connects to which system wire, as solenoids are not polarity-sensitive. Ensure connections are secure and waterproof using appropriate connectors.
- Wetterfoarsjenning werstelle: Slowly open the main water shut-off valve. Check for leaks around the newly installed solenoid.
- Testsysteem: Activate the corresponding zone from your irrigation controller to ensure the valve opens and closes correctly.
4. Bedriuwsinstruksjes
The solenoid operates automatically in conjunction with your irrigation controller. It can also be operated manually for testing or specific watering needs.
4.1 Automatyske operaasje
Once installed and wired correctly, the solenoid will receive electrical signals from your irrigation controller. When a signal is sent, the solenoid's plunger will lift, allowing water pressure to open the valve. When the signal stops, the plunger drops, and water pressure closes the valve.
4.2 Hânlieding
To manually open the valve:
- Locate the solenoid on the valve.
- Turn the solenoid handle approximately a quarter to a half turn counter-clockwise. You should hear water begin to flow.
To manually close the valve:
- Turn the solenoid handle clockwise until it is hand-tight. The water flow should stop.
5. Underhâld
Regular maintenance helps ensure the longevity and reliable operation of your Rain Bird solenoid and irrigation system.
- Periodyske ynspeksje: Annually inspect the solenoid and its wiring for any signs of wear, corrosion, or damage.
- Clean Connections: Ensure electrical connections are clean and free of dirt or moisture. Replace waterproof connectors if they show signs of degradation.
- Kontrolearje op lekken: Regularly check around the valve and solenoid for any water leaks. Address leaks promptly to prevent water waste and potential damage.
- Winterisaasje: In regions subject to freezing temperatures, ensure your irrigation system, including solenoids and valves, is properly winterized to prevent freeze damage. Consult your irrigation system's main manual for specific winterization procedures.
6. Probleemoplossing
This section addresses common issues you might encounter with your solenoid.
| Probleem | Mooglike oarsaak | Oplossing |
|---|---|---|
| Valve does not open automatically. |
|
|
| Valve does not close. |
|
|
| Water leaks from solenoid. |
|
|
7. Spesifikaasjes
| Eigenskip | Detail |
|---|---|
| Model Number | 236239 |
| Kompatibiliteit | Rain Bird PGA, PEB, EFB-CP, BPE/BPES, and GB Valves |
| Produkt Ofmjittings | 0.02 x 4 x 5 inch |
| Item Gewicht | 4.8 oz |
| Fabrikant | Rain Bird |
| ASIN | B003KPJLR0 |
8. Garânsje en stipe
For specific warranty information regarding your Rain Bird Replacement Solenoid Kit (Model 236239), please refer to the documentation provided with your original purchase or visit the official Rain Bird webside. Garânsjebetingsten en -kondysjes kinne ferskille.
For technical support, additional product information, or to purchase genuine Rain Bird parts, please visit the Rain Bird Store on Amazon or the official Rain Bird corporate website.