PeakTech P 3131
PeakTech True RMS P 3131 Clamp Meter mei multimeter brûkershânlieding
Model: P 3131 | Brand: PeakTech
1. Ynlieding
This manual provides comprehensive instructions for the safe and effective use of the PeakTech True RMS P 3131 Clamp Meter with Multimeter. This device is designed for measuring AC/DC currents without circuit interruption, as well as AC/DC voltage and resistance, with continuity testing capabilities. It features a 3 3/4 digit LCD display with True RMS measurement for accurate readings.
Lês dizze hantlieding goed troch foardat jo it apparaat brûke en bewarje it foar takomstige referinsje.
2. Safety Information
WARNING: Improper use of this meter can cause damage, shock, injury, or death. Always follow all safety precautions.
- Altyd hâlde oan lokale en nasjonale feiligens koades.
- Do not use the meter if it appears damaged or if the insulation on test leads is compromised.
- Soargje derfoar dat de meter ynsteld is op de juste funksje en it juste berik foardat jo mjittingen dogge.
- Avoid contact with live circuits. Use appropriate personal protective equipment (PPE).
- The device is rated for CAT II 600V. Do not exceed these limits.
- Ferfange de batterijen fuortendaliks as de yndikator foar lege batterij ferskynt.
- Do not operate the meter in explosive atmospheres.
3. Produkt Overview en komponinten
The PeakTech P 3131 is a robust and reliable clamp meter. Familiarize yourself with its main components:

figuer 1: Front view of the PeakTech P 3131 Clamp Meter, dy't de cl sjen litamp jaw, function selector, LCD display, and input terminals.
- Clamp Jaw: For non-contact AC/DC current measurement.
- Funksjeselektorknop: To select measurement modes (A~, A=, V~, V=, Ω/Continuity, OFF).
- LCD Display: Toant mjittingslêzingen, ienheden en yndikatoaren.
- Knoppen: AC/DC, ZERO, H/MAX (Data Hold/Max Hold).
- Ynfierterminalen: COM (common) and VΩ (voltage/resistance) for test leads.
- Hânbeskerming: Provides protection against accidental contact.
4. Opsette
4.1 Batterij Ynstallaasje
The PeakTech P 3131 requires two 1.5V AAA batteries (included). To install or replace batteries:
- Soargje derfoar dat it apparaat OFF is.
- Locate the battery compartment cover on the rear of the meter.
- Brûk in schroevendraaier om it fak te iepenjen.
- Insert the two AAA batteries, observing correct polarity (+ and -).
- Ferfange de batterij compartment cover en befestigje it mei de skroef.
When the low battery indicator appears on the display, replace the batteries immediately to ensure accurate measurements.
4.2 Testkabels ferbine
Foar voltage, resistance, and continuity measurements, connect the supplied test leads:
- Foegje de swarte test lead yn 'e COM (common) input terminal.
- Foegje de reade test lead yn 'e VΩ ynfier terminal.

Figure 2: PeakTech P 3131 Clamp Meter shown with its carrying case, test leads, batteries, and user manual.
5. Bedriuwsinstruksjes
5.1 Power On / Off
Rotate the function selector dial from the "OFF" position to any desired measurement function to power on the meter. To power off, rotate the dial back to "OFF". The meter features an automatic power-off function (can be deactivated) to conserve battery life.
5.2 AC/DC stroommjitting (Clamp)
To measure current without breaking the circuit:
- Draai de funksjeselektorknop nei de A~ (AC Current) or A= (DC Current) position.
- Druk op de AC/DC button if you need to switch between AC and DC current modes (if the dial position combines them).
- Druk op de NUL button to zero the display before measuring DC current, especially for small currents, to compensate for residual magnetism.
- Iepenje de clamp kaak troch op de trekker te drukken.
- Allinnich ynslute ien conductor with the clamp kaak. Soargje derfoar dat de kaak folslein sluten is.
- Lês de aktuele wearde op it LCD-display.
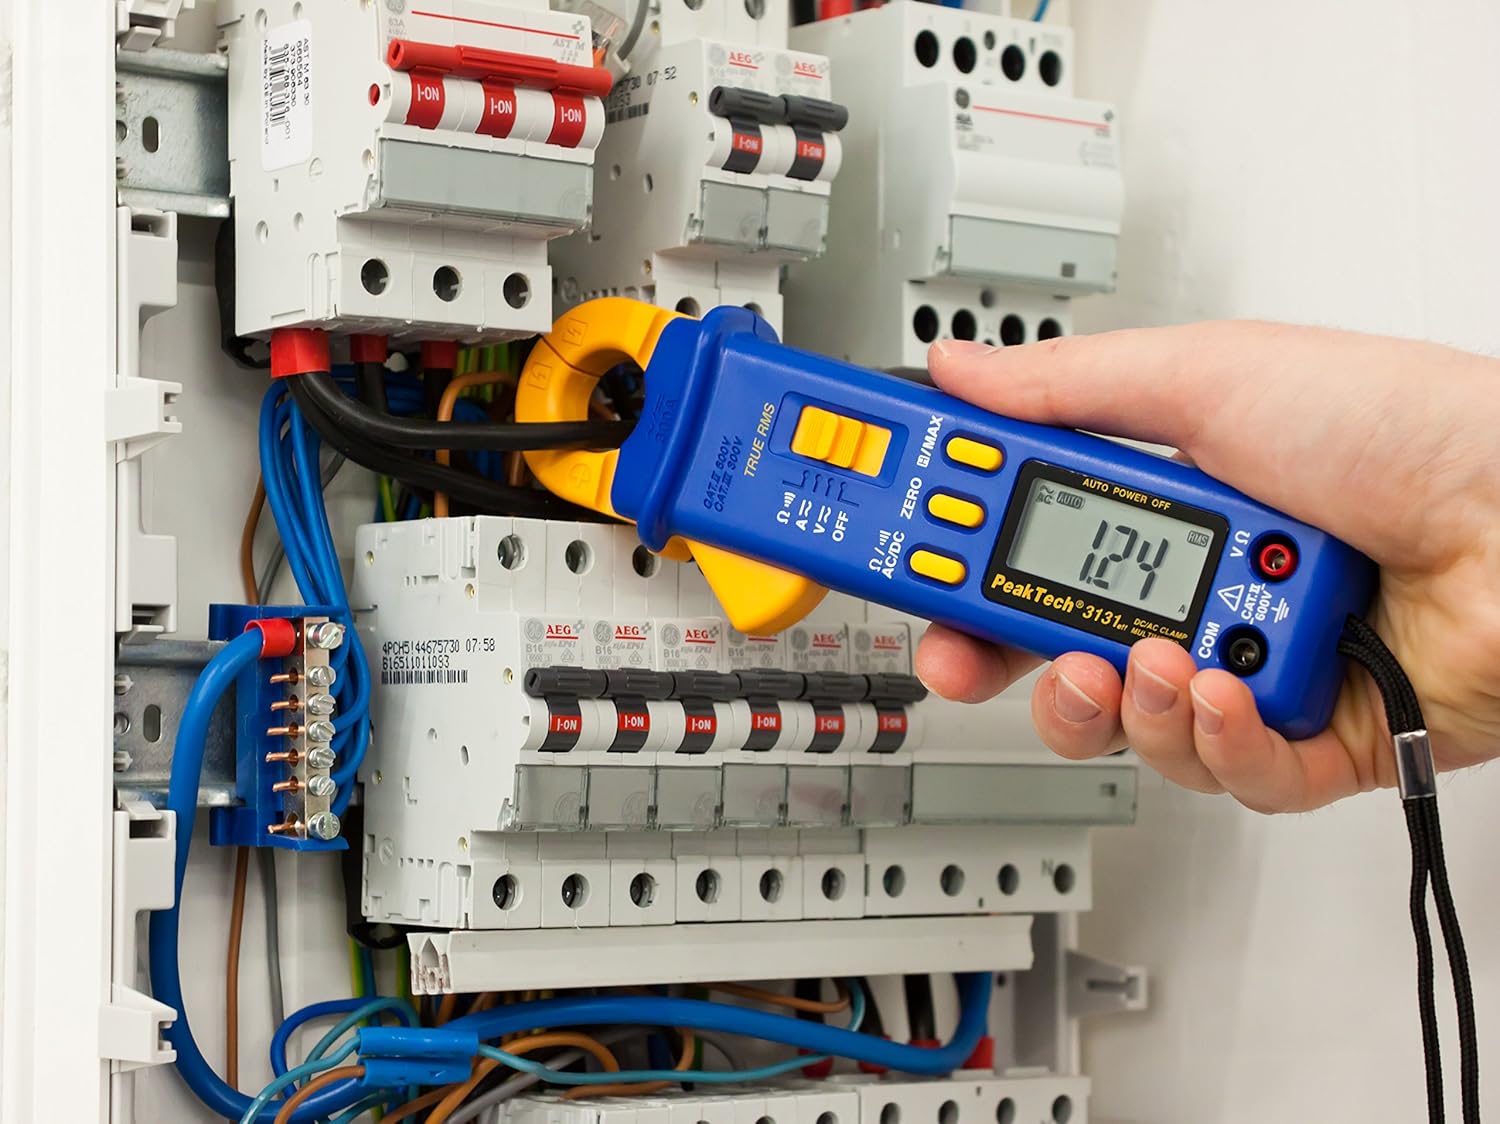
Figure 3: The PeakTech P 3131 Clamp Meter in use, measuring current on a single conductor within an electrical panel.
5.3 AC/DC Voltage Meting
Om voltage:
- Ferbine de testkabels lykas beskreaun yn seksje 4.2.
- Draai de funksjeselektorknop nei de V~ (AC-folumetage) of V= (DC Voltage) posysje.
- Ferbine de testsondes parallel mei it sirkwy of komponint dat jo mjitte wolle.
- Lês de voltage wearde op it LCD -display.
5.4 Resistance and Continuity Measurement
To measure resistance or check for continuity:
- Ferbine de testkabels lykas beskreaun yn seksje 4.2.
- Draai de funksjeselektorknop nei de Ω/))) (Resistance/Continuity) position.
- For resistance: Connect the test probes across the component. Ensure the circuit is de-energized.
- For continuity: Touch the test probes to the two points you want to check. A continuous beep indicates a low-resistance path (continuity).
- Lês de wjerstânswearde op it LCD-skerm.
5.5 Spesjale funksjes
- Echte RMS: The meter measures True Root Mean Square values for AC voltage and current, providing accurate readings for non-sinusoidal waveforms.
- Gegevenshâld (H): Druk op de H/MAX knop koart om de aktuele lêzing op it display te befriezen. Druk nochris om los te litten.
- Maximum Value Hold (MAX): Druk en hâld de H/MAX button to capture and display the maximum measured value. Press again to exit.
- ZERO Function: Used to zero the display for DC current measurements to eliminate offset errors.
- Automatyske berik: The meter automatically selects the appropriate measurement range.
- Auto Power Off: The meter automatically turns off after a period of inactivity to save battery. This feature can typically be disabled by holding a specific button during power-on (refer to the device's on-screen indicators or a more detailed manual if available).
6. Underhâld
6.1 Cleaning
Wipe the meter's case with a damp doek en in myld reinigingsmiddel. Brûk gjin skuurmiddels of oplosmiddels. Soargje derfoar dat de meter folslein droech is foar gebrûk.
6.2 Batterijferfanging
Refer to Section 4.1 for instructions on battery replacement. Always use two fresh 1.5V AAA batteries. Remove batteries if the meter is not used for an extended period to prevent leakage.
6.3 Opslach
Store the meter in a cool, dry place, away from direct sunlight and extreme temperatures. Use the provided carrying case for protection.
7. Probleemoplossing
| Probleem | Mooglike oarsaak | Oplossing |
|---|---|---|
| De meter giet net oan. | Deade of ferkeard ynstalleare batterijen. | Kontrolearje de polariteit fan 'e batterij; ferfange batterijen. |
| "OL" or "OVER" displayed. | Mjitting giet oer it selektearre berik of de maksimale kapasiteit fan 'e meter. | Select a higher range (if manual ranging) or ensure measurement is within meter's limits. |
| Inaccurate DC current reading. | Residual magnetism in clamp jaw. | Druk op de NUL button before measurement. |
| Gjin kontinuïteitspiep. | Iepen sirkwy of hege wjerstân. | Check connections; ensure circuit is complete. |
If problems persist, contact PeakTech customer support or a qualified service technician.
8. Technyske spesifikaasjes
| Parameter | Spesifikaasje |
|---|---|
| Skerm | 3 3/4 digit LCD, max. 3999 counts |
| DC Voltage (DCV) | 0.1 mV to 600 V (Accuracy: 0.5% + 2 digits) |
| AC Voltage (ACV) | 1 mV to 600 V (Accuracy: 1.5% + 5 digits) |
| DC Current (DCA) | 10 mA to 300 A (Accuracy: 1% + 2 digits) |
| AC Current (ACA) | 10 mA to 300 A (Accuracy: 1% + 3 digits) |
| Ferset (Ω) | 0.1 Ω to 40 MΩ (Accuracy: 0.9% + 2 digits) |
| Kontinuïteitstest | Buzzer funksje |
| Echte RMS | Yes, for AC measurements |
| Kaak iepening | 22 mm max. conductor diameter |
| Safety Rating | EN 61010-1, CAT II 600 V |
| Streamtafier | 2 x 1.5V AAA-batterijen |
| Ofmjittings (L x B x H) | 192 x 66 x 27 mm (sawat 7.56 x 2.6 x 1.06 inch) |
| Gewicht | 205 g (sawat 0.45 lbs) |
9. Garânsje en stipe
PeakTech products are manufactured under strict quality control. This product is covered by a standard manufacturer's warranty against defects in materials and workmanship. Please refer to the warranty card included with your product or visit the official PeakTech webside foar detaillearre garânsjebetingsten en -kondysjes.
For technical support, service, or calibration inquiries, please contact your local PeakTech distributor or the PeakTech customer service department. Contact information can typically be found on the PeakTech webside of yn 'e produktferpakking.
Ask a question about this manual
Ask about setup, troubleshooting, compatibility, parts, safety, or missing instructions. Manuals+ will review the question and use this page’s manual context to help answer it.