Ynlieding
This manual provides detailed instructions for the installation, operation, and maintenance of your Venstar T1900 Residential Slimline Platinum Thermostat. Please read this manual thoroughly before attempting to install or operate the thermostat to ensure proper function and to avoid potential damage.
Wichtige feiligens ynformaasje
- Always turn off power to the heating/cooling system at the main circuit breaker or fuse box before installing or servicing the thermostat.
- Dizze termostaat wurket op 24 Volt AC. Net ferbine mei it netvolume.tage (120V of 240V).
- Installation should be performed by a qualified technician if you are unfamiliar with electrical wiring.
- Do not short circuit the terminals on the gas valve or at the system control to test the thermostat. This will damage the thermostat and void the warranty.
- Ensure all wiring connections are secure and insulated to prevent short circuits.
Pakketynhâld
Kontrolearje dat jo pakket de folgjende items befettet:
- Venstar T1900 Termostaat-ienheid
- Montagemateriaal (skroeven en muorreankers)
- User Manual (dit dokumint)
Produkt oerview
The Venstar T1900 is a 7-day programmable digital thermostat designed for residential use. It offers precise temperature control and energy-saving scheduling capabilities. This thermostat is compatible with heat/cool, heat pump, and dual-fuel systems, controlling up to three heat stages en twa koele stages.
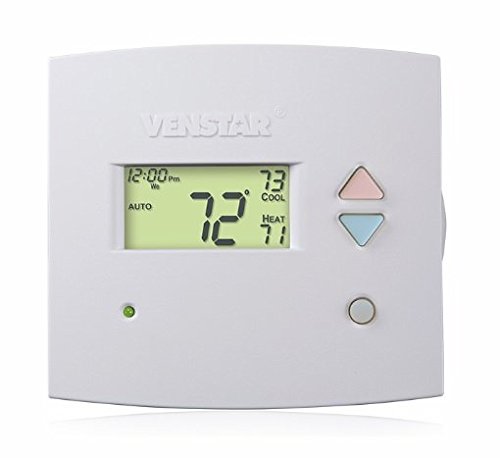
Ofbylding 1: Front view of the Venstar T1900 Thermostat. This image displays the thermostat's LCD screen and control buttons, indicating its slimline design.
Key Features:
- 7-dagen programmearring: Allows for customized heating and cooling schedules for each day of the week.
- Systeemkompatibiliteit: Works with heat/cool, dual-fuel, and heat pump systems.
- Multi-Stage kontrôle: Manages up to three heat stages en twa koele stages.
- Mooglikheid foar ôfstânkontrôle: Controllable by phone using an optional add-on (sold separately).
- Automatic or Manual Operation: Provides flexibility for scheduled or on-demand temperature adjustments.
Ynstallaasje Guide
Tools nedich:
- Skroevendraaier (Phillips en/of platte kop)
- Drill with appropriate drill bit (if installing new wall anchors)
- Draadstrippers
- Poatlead
- Nivo (opsjoneel)
1. Skakel de macht út
Locate the circuit breaker or fuse box that controls your heating and cooling system. Turn off the power completely before proceeding with any wiring.
2. Remove Old Thermostat (if applicable)
- Ferwiderje foarsichtich de deksel fan jo âlde termostaat.
- Nim in foto fan 'e besteande bedradingferbiningen as referinsje.
- Label each wire with the terminal designation it was connected to (e.g., R, G, Y, W).
- Disconnect the wires and remove the old thermostat's mounting plate from the wall.
3. Mount the New Thermostat Base
- Separate the front cover of the T1900 thermostat from its base plate.
- Position the base plate on the wall where you want to install the thermostat. Ensure it is level.
- Markearje de mounting gatten mei in potlead.
- Boarje foarboargaten as it nedich is en set muorreankers yn.
- Befestigje de basisplaat fan 'e termostaat oan 'e muorre mei de levere skroeven.
4. Bedrading
Connect the wires from your HVAC system to the corresponding terminals on the T1900 thermostat base. Refer to the wiring diagram provided with your specific HVAC system for precise connections. Ensure wires are stripped approximately 3/8 inch and securely fastened under the terminal screws.
Common Terminal Designations:
- R/Rc/Rh: 24V Power (Heating/Cooling)
- C: Common (24V return)
- G: Fan
- J/J1: Kompressor S.tage 1 (koeling)
- Y2: Kompressor S.tage 2 (koeling)
- W/W1: Heat S.tage 1 (ferwaarming)
- w2: Heat S.tage 2 (ferwaarming)
- O / B: Reversing Valve (Heat Pumps)
Note: The T1900 supports various system types. Consult the detailed wiring diagrams in the full installation manual for specific configurations (e.g., heat pump with auxiliary heat, conventional multi-stage systems).
5. Attach Thermostat to Base
Once wiring is complete and verified, carefully align the thermostat front cover with the mounted base plate and snap it into place.
6. Weromsette Power
Return to your circuit breaker or fuse box and restore power to your heating and cooling system.
Inisjele opset
Upon initial power-up, the thermostat may prompt you to configure basic settings. Follow the on-screen instructions to set the current date, time, and system type (e.g., Conventional, Heat Pump).
System Type Configuration:
It is crucial to correctly configure the thermostat for your specific HVAC system. Incorrect settings can lead to improper operation or damage. Access the installer settings menu (refer to the full installation guide for specific button sequences) to select:
- Systeem type: Heat/Cool, Heat Pump, Dual Fuel
- Oantal waarmte Stages
- Oantal Cool Stages
- Reversing Valve Operation: O (Cooling) or B (Heating)
Operating Instructions
De werjefte begripe:
The LCD screen displays the current temperature, set temperature, system mode, fan mode, time, and programming status. Refer to the icons and indicators on the screen for current operational status.
Setting System Mode:
Druk op de WIZE button to cycle through available system modes:
- HJITTE: The system will operate to maintain the heating setpoint.
- KOEL: The system will operate to maintain the cooling setpoint.
- AUTO: De termostaat wikselt automatysk tusken ferwaarmjen en koeljen as nedich om it ynstelde temperatuerberik te behâlden.
- ÚT: It ferwaarmings- en koelsysteem is útskeakele.
Setting Fan Mode:
Druk op de FAN button to cycle through fan modes:
- AUTO: De fentilator draait allinich as it ferwaarmings- of koelsysteem aktyf is.
- OP: De fentilator draait kontinu, ûnôfhinklik fan ferwaarmings- of koeloproppen.
Temperatuer oanpasse:
Brûk de UP en OMLEECH arrow buttons to adjust the desired temperature setpoint. In programmable modes, this will temporarily override the schedule until the next scheduled change.
Programming Schedules (7-Day):
The T1900 allows for 7-day programming, enabling different schedules for each day of the week. This feature helps save energy by adjusting temperatures when you are away or asleep.
- Druk op de PROGRAMMA knop om de programmearring modus yn te gean.
- Brûk de DEI button to select the day or group of days you wish to program (e.g., Mon-Fri, Sat-Sun, or individual days).
- Brûk de TIID button to cycle through the four available periods: Wake, Leave, Return, Sleep.
- Brûk de UP en OMLEECH arrow buttons to set the desired temperature for each period.
- Brûk de HÂLDE button to exit programming mode or save changes.
Refer to the detailed programming section in the full user guide for advanced options and specific button sequences.
Remote Control (Optional Add-on):
The Venstar T1900 thermostat can be controlled remotely via a phone using an optional add-on module (sold separately). This module connects to the thermostat and allows for remote access and control through a dedicated application. Installation and setup instructions for the remote control module are provided with the module itself.
Ûnderhâld
Cleaning the Thermostat:
To maintain the appearance and functionality of your thermostat, periodically wipe the exterior with a soft, damp doek. Brûk gjin skurende reinigingsmiddels, oplosmiddels of gemyske sprays, om't dizze it plestik en elektroanyske ûnderdielen beskeadigje kinne.
Batterij ferfanging:
The Venstar T1900 thermostat does not require batteries for operation as it is powered by the 24V AC system.
Troubleshooting
If you experience issues with your Venstar T1900 thermostat, consult the following common problems and solutions:
| Probleem | Mooglike oarsaak | Oplossing |
|---|---|---|
| Termostaat werjefte is leech | Gjin stroom nei de termostaat. | Kontrolearje de stroomûnderbrekker foar jo HVAC-systeem. Soargje derfoar dat alle bedrading feilich is. |
| Heating/Cooling system does not respond | Incorrect system mode selected; wiring issue; system lockout. | Verify the system mode (HEAT/COOL/AUTO). Check wiring connections. Wait 5 minutes for system lockout to reset. |
| Temperatuerlêzing liket ûnkrekt | Thermostat location; sensor obstruction. | Ensure the thermostat is not exposed to direct sunlight, drafts, or heat sources. Clean any dust from the thermostat vents. |
| Programming schedule is not working | Program not saved; temporary override active; incorrect time/day setting. | Ensure programs are saved. Check if a temporary override is active and cancel it. Verify current time and day settings. |
| De fentilator draait kontinu yn AUTO-modus | Fan mode set to ON; wiring issue. | Press the FAN button to ensure it is set to AUTO. Check fan wiring. |
If these solutions do not resolve the issue, please contact customer support or a qualified HVAC technician.
Spesifikaasjes
| Eigenskip | Spesifikaasje |
|---|---|
| Merk | Venstar |
| Model Namme | Venstar T1900 |
| Controller Type | Drukknop |
| Special Feature | Programmierber |
| Kleur | Wyt |
| Spesifike gebrûk foar produkt | Heat Pump, Heater |
| Temperatuer Control Type | Programmable, Smart/Remote (with add-on) |
| Voltage | 24 Volts AC |
| Display Type | LCD of LED |
| Control Metoade | Remote (with add-on) |
| Backlight | Ja |
| Produkt Ofmjittings | 5.3 x 2 x 2 inch |
| Item Gewicht | 0.01 wyb |
| Batterijen nedich? | Nee |
Warranty Information
Venstar products are manufactured to high-quality standards. This product is covered by a limited warranty against defects in materials and workmanship. The specific terms and duration of the warranty may vary. Please refer to the warranty card included with your product or visit the official Venstar webside foar detaillearre ynformaasje oer garânsje en registraasjeprosedueres.
Klant Support
For technical assistance, troubleshooting, or warranty inquiries, please contact Venstar customer support. You can typically find contact information, including phone numbers and email addresses, on the official Venstar webside (www.venstar.com) of op 'e produktferpakking.
When contacting support, please have your thermostat model number (T1900) and any relevant purchase information ready.