1. Wichtige Safety Ynstruksjes
Read all instructions before using this appliance. To reduce the risk of fire, electric shock, or injury to persons when using your dryer, follow basic precautions, including the following:
- Install and store the dryer in a location where it will not be exposed to water or weather.
- Droege gjin artikels dy't earder skjinmakke, wosken, wiet makke binne yn, of bevlekt binne mei benzine, stomerijoplosmiddels, of oare brânbere of eksplosive stoffen, om't se dampen útstjitte dy't ûntsteane of eksplodearje kinne.
- Lit bern net boartsje op of yn it apparaat. Nauwe tafersjoch fan bern is nedich as it apparaat wurdt brûkt tichtby bern.
- Foardat de droeger út 'e tsjinst wurdt fuortsmiten of fuorthelle, ferwiderje de doar nei it drogen fak.
- Rikke net yn it apparaat as de trommel beweecht.
- Do not install or operate this dryer without the exhaust duct connected.
- Hâld gebiet om 'e útlaat iepening en oanswettende omlizzende gebieten frij fan' e accumulation fan lint, stof, en smoargens.
- It ynterieur fan it apparaat en it útlaatkanaal moatte periodyk skjinmakke wurde troch kwalifisearre servicepersoniel.
- Reparearje of ferfange gjin ûnderdiel fan it apparaat en besykje gjin ûnderhâld út te fieren, útsein as it spesifyk oanrikkemandearre is yn dizze hantlieding of yn publisearre ynstruksjes foar brûkersreparaasjes dy't jo begripe en de feardigens hawwe om út te fieren.
2. Opset en ynstallaasje
Proper installation is crucial for the safe and efficient operation of your dryer. Refer to the detailed installation instructions provided with your appliance for specific electrical, venting, and leveling requirements.
2.1 Útpakke
Carefully remove all packaging materials, including any shipping bolts or restraints. Inspect the dryer for any shipping damage. Report any damage immediately to your dealer.
2.2 Lokaasje easken
The dryer must be installed in a location with adequate clearance for proper air circulation and maintenance. Ensure the floor is level and capable of supporting the dryer's weight (approximately 136 pounds). Proper ventilation is essential to prevent lint accumulation and ensure efficient drying.
2.3 Elektryske ferbining
This is an electric dryer requiring a dedicated 240V, 30A electrical supply. Ensure the electrical installation complies with all local codes and ordinances. A qualified electrician should perform the electrical connection.
2.4 Lüfting
The dryer must be vented to the outdoors using a rigid metal duct. Avoid using flexible plastic or foil ducts, as they can restrict airflow and pose a fire hazard. The vent system should be as short and straight as possible.
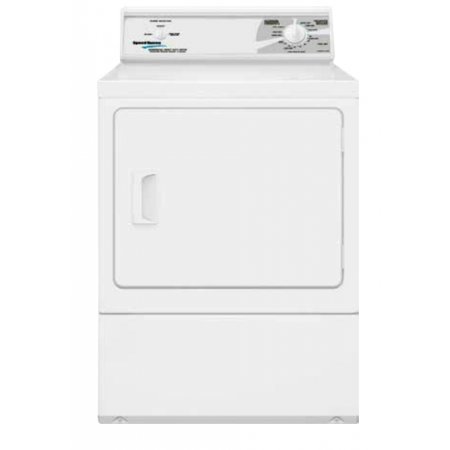
Ofbylding: Front view of the Speed Queen LDE30RGS173TW01 Home Style Mechanical Electric Dryer. This image shows the overall design of the appliance, including the front-loading door and the mechanical control panel located on the top rear of the unit.
3. Bedriuwsinstruksjes
This section provides guidance on how to use your Speed Queen electric dryer effectively.
3.1 De droeger laden
- Load items loosely into the dryer drum. Do not overload the dryer; the 18 lb capacity refers to dry weight. Overloading can reduce drying efficiency and increase wear on the appliance.
- Separate heavy items from lightweight items for more uniform drying.
- Ensure all items are suitable for machine drying according to their care labels.
3.2 Control Panel Overview
The LDE30RGS173TW01 features mechanical controls for straightforward operation.
- Syklusseleksjeknop: Used to select the desired drying cycle (e.g., Regular, Permanent Press, Delicate).
- Temperatuerseleksjeknop: Used to choose the drying temperature (e.g., High, Medium, Low, Air Fluff).
- Startknop: Press to begin the selected drying cycle.
3.3 Selecting a Drying Cycle
- Load the dryer with items.
- Slút de droeger doar feilich.
- Turn the Cycle Selector Knob to the desired drying cycle based on the fabric type.
- Turn the Temperature Selector Knob to the appropriate heat setting.
- Press the Start Button to begin the cycle. The dryer will tumble and heat according to the selected settings.
The dryer will automatically stop when the selected cycle is complete. For optimal results, remove items promptly to reduce wrinkling.
4. Underhâld
Regelmjittich ûnderhâld soarget foar de lange libbensdoer en effisjinte prestaasjes fan jo droeger.
4.1 It pluisfilter skjinmeitsje
Clean the lint filter before or after every load. A clogged lint filter restricts airflow, increases drying time, and can be a fire hazard.
- Locate the lint filter, typically inside the dryer door opening.
- Trek it filter rjocht út.
- Remove any accumulated lint by hand.
- Insert the filter back into its housing until it is securely in place.
4.2 De bûtenkant fan 'e droeger skjinmeitsje
Wipe de bûtenste oerflakken mei in sêft, damp doek. Foarkom skuurmiddels of oplosmiddels dy't de finish beskeadigje kinne.
4.3 Cleaning de exhaust System
Periodically inspect and clean the entire exhaust duct system to prevent lint buildup. This should be done at least once a year, or more frequently if drying large loads or lint-producing items. Professional service is recommended for thorough cleaning.
5. Probleemoplossing
Foardat ropt foar tsjinst, review de folgjende mienskiplike problemen en har mooglike oplossingen.
| Probleem | Mooglike oarsaak | Oplossing |
|---|---|---|
| Dryer begjint net | Power cord unplugged; circuit breaker tripped; door not closed; Start button not pressed firmly. | Check power connection; reset breaker; ensure door is latched; press Start button firmly. |
| Dryer waarmet net | No heat selected; thermal fuse blown; heating element failure; incorrect electrical connection. | Verify temperature setting; contact qualified service personnel for fuse/element check. |
| Klean duorret te lang om te droegjen | Lint filter clogged; exhaust vent restricted; dryer overloaded; incorrect cycle/temperature. | Clean lint filter; check/clean exhaust vent; reduce load size; select appropriate cycle/temperature. |
| Oermjittich lûd | Frjemde foarwerpen yn 'e trommel; droeger net wetterpas; fersliten trommelrollen of lagers. | Check drum for objects; level the dryer; contact service for internal component inspection. |
If these solutions do not resolve the issue, contact Speed Queen customer service or a qualified appliance technician.
6. Spesifikaasjes
Key specifications for the Speed Queen LDE30RGS173TW01 Electric Dryer.
- Model: LDE30RGS173TW01
- Merk: Speed Queen
- Type: Home Style Mechanical Electric Dryer
- Kapasiteit: 18 Pounds (dry weight)
- Fuel Type: Elektrysk
- Heating Element: 5,350 watt
- Control Type: Meganysk
- Drum materiaal: Galvanisearre stiel
- Door Type: Extra large 2.06 ft front load
- Item Gewicht: Likernôch 136 pûn
- Ofmjittings (H x B x D): Ongeveer 45 x 31 x 30 inch (Pakketôfmjittings)
- Kleur: Wyt
- Sertifikaasje: UL
7. Garânsje en stipe
Your Speed Queen dryer is backed by a manufacturer's warranty. Please refer to the warranty card included with your purchase for specific terms, conditions, and registration information. Keep your proof of purchase for warranty claims.
Klant Support
For technical assistance, service scheduling, or parts inquiries, please contact Speed Queen customer support. Contact information can typically be found on the manufacturer's webside of yn jo garânsjedokumintaasje.
When contacting support, please have your dryer's model number (LDE30RGS173TW01) and serial number readily available.


