
Ynlieding
This manual provides detailed instructions for the setup, operation, and maintenance of your groov e Atlas Radio Alarm Clock with Wireless Charger. Please read this manual thoroughly before using the device to ensure proper function and to maximize your user experience. Keep this manual for future reference.
Pakketynhâld
Kontrolearje oft alle items yn it pakket oanwêzich binne:
- groov e Atlas Radio Alarm Clock
- Stromadapter
- User Manual
Produkt Features
- Draadloos opladen (5W): Conveniently charge compatible smartphones by placing them on the top surface.
- FM-radio: Harkje nei jo favorite FM-stasjons.
- LED-skerm: Dúdlike digitale tiidswerjefte.
- Stromnet: Reliable power supply for continuous operation.
- USB-oplaadstasjon: Additional USB port for charging other devices.
- Dual alarm: Stel twa ûnôfhinklike alarmen yn foar ferskillende wekkertiden.
- Display dimmer: Adjust the brightness of the LED display.
Opsette
- Ferbine macht: Insert the power adapter into the 'DC IN' port on the back of the alarm clock, then plug the adapter into a wall outlet. The display will light up.
- Ynstelle tiid:
- Press and hold the 'TIME SET' button located on the back of the unit.
- Use the 'TUN-' or 'TUN+' buttons on the top panel to adjust the hour.
- Press 'TIME SET' again to confirm the hour and move to minutes.
- Use 'TUN-' or 'TUN+' to adjust the minutes.
- Press 'TIME SET' once more to confirm and exit time setting.
- To switch between 12-hour and 24-hour format, press the '12/24H' button on the back.

Ofbylding: Efterkant view of the groov e Atlas alarm clock, highlighting the DC IN power input and the USB charging port. The '12/24H TIME SET' and 'SLEEP' buttons are also visible.
Operating Instructions
Setting Alarms (ALM1 / ALM2)
- Press the 'ALM1' or 'ALM2' button to select the alarm you wish to set. The alarm icon will flash on the display.
- Use the 'TUN-' or 'TUN+' buttons to adjust the alarm hour.
- Press the 'ALM1' or 'ALM2' button again to confirm the hour and move to minutes.
- Use 'TUN-' or 'TUN+' to adjust the alarm minutes.
- Press the 'ALM1' or 'ALM2' button a third time to confirm the alarm time. The alarm icon will remain lit, indicating the alarm is active.
- To deactivate an alarm, press the corresponding 'ALM1' or 'ALM2' button until the alarm icon disappears from the display.
FM Radio Operaasje
- Yn-/útskeakelje: Press the 'ON/OFF' button to turn the radio on or off.
- Auto Scan: Press the 'SCAN' button to automatically scan and save available FM stations.
- Hânlieding tuning: Use the 'TUN-' or 'TUN+' buttons to manually adjust the frequency. Press and hold for faster tuning.
- Foarôf ynstelde stasjons: Use 'MEM-' or 'MEM+' to cycle through saved preset stations.
- Volume oanpasse: Use the 'VOL-' or 'VOL+' buttons to control the radio volume.
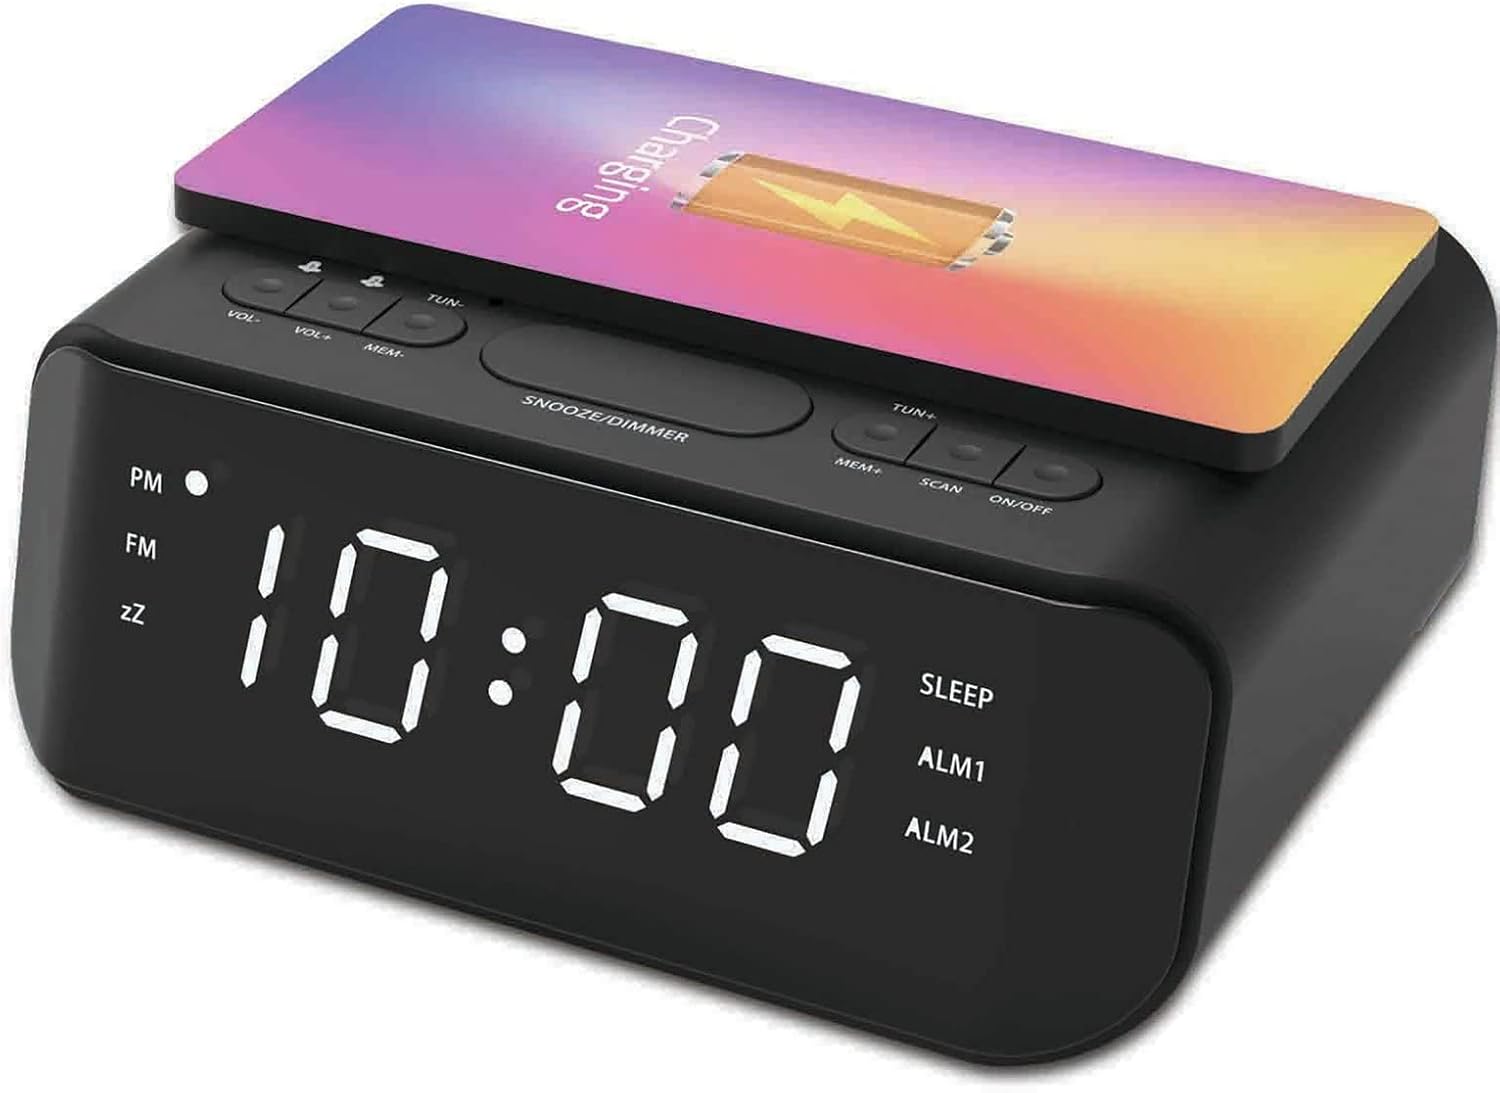
Ofbylding: Boppe view of the groov e Atlas alarm clock, illustrating the layout of the control buttons for volume, tuning, memory, scan, and power.
Draadloze opladen
- Ensure your smartphone is compatible with 5W Qi wireless charging.
- Place your compatible smartphone centrally on the wireless charging pad located on the top surface of the alarm clock.
- The phone's display should indicate that charging has begun. If not, adjust the phone's position.

Image: A smartphone placed on the groov e Atlas alarm clock's top surface, showing the charging indicator on the phone's screen, confirming wireless charging is active.
USB Opladen
- Connect a USB charging cable (not included) to the USB port on the back of the alarm clock.
- Ferbine it oare ein fan 'e kabel mei jo apparaat.
- Jo apparaat sil begjinne te laden.
Dimmer werjaan
Press the 'SNOOZE/DIMMER' button to cycle through different brightness levels for the LED display. This allows you to adjust the display to your preferred visibility, especially in dark environments.
Ûnderhâld
- Reiniging: Brûk in sêfte, droege doek om it oerflak fan 'e wekker skjin te meitsjen. Brûk gjin floeibere skjinmakkers of skurende materialen.
- Opslach: As net yn gebrûk foar langere perioaden, lûke it apparaat út en bewarje it yn in koel, droech plak.
- Feilichheid: Do not expose the device to water, high humidity, or extreme temperatures. Avoid dropping or subjecting the device to strong impacts.
Troubleshooting
| Probleem | Mooglike oarsaak | Oplossing |
|---|---|---|
| Apparaat giet net oan. | Stroomadapter net oansletten of defekt stopkontakt. | Soargje derfoar dat de stroomadapter goed yn it apparaat en in wurkjend stopkontakt sit. Besykje in oar stopkontakt. |
| Draadloos opladen wurket net. | Tillefoan net Qi-kompatibel of net goed pleatst. | Verify your phone supports Qi wireless charging. Reposition the phone centrally on the charging pad. Remove any thick phone cases. |
| It alarm giet net ôf. | Alarm net aktivearre of folume te leech. | Check if the alarm icon is lit on the display. Increase the alarm volume using the 'VOL+' button. |
| Radio-ûntfangst is min. | Swak sinjaal of antenneposysje. | Extend and adjust the position of the FM antenna wire on the back of the unit for better reception. |
Spesifikaasjes
- Model Oantal: GVWC06BK
- Merk: groov e
- Kleur: Swart
- Display Type: Digitale LED
- Power Boarne: Mains Powered (AC Adapter included)
- Triedleaze laadútfier: 5W
- USB-laadútfier: 5V/1A
- Alarm Features: Dual Alarm, Snooze
- Radio: FM
- Materiaal: Acrylonitril Butadien Styrene (ABS)
- Foarm: Rjochthoekich
- Montage Type: Tafel Mount
- Bewegingstype: Quartz
- Batterijen: Not included (requires 1 battery for backup, type not specified in data)
Garânsje en stipe
Your groov e Atlas Radio Alarm Clock GVWC06BK comes with a standard manufacturer's warranty. Please refer to the warranty card included in your package for specific terms and conditions, including the warranty period and coverage details.
For technical support, troubleshooting assistance, or warranty claims, please contact groov e customer service through their official webside of de kontaktgegevens dy't op jo garânsjekaart steane.
Bewarje jo oankeapbewiis foar alle fragen oer garânsje.