REXING H6
REXING Woodlens H6 dûbele kamera trailkamera brûkershânlieding
Model: H6
1. Ynlieding
The REXING Woodlens H6 is an advanced dual-camera trail camera designed for capturing high-quality video and still images of wildlife, property, or other outdoor subjects. Featuring both a 4K Ultra HD lens for daytime recording and an FHD Infrared lens for night vision, the H6 ensures clear visuals in various lighting conditions. Its robust, weather-resistant design and long standby time make it an ideal solution for extended outdoor surveillance.
2. Produkt Overview en Key Features
- Dûbel kamerasysteem: Captures 4K Ultra HD video during the day and FHD Infrared video at night with simultaneous audio recording. Designed to avoid IR CUT switching sounds that might disturb wildlife.
- Imaging mei hege resolúsje: Supports up to 20MP still images and cinematic video quality.
- Integrated LCD & Speaker: Features a built-in 2.4-inch LCD screen and speaker for direct viewing and editing of recordings without external devices.
- Avansearre nachtfisy: Equipped with 35M IR Flash and double 850nm high-powered Infrared lights, illuminating subjects up to 65 feet away for clear night images.
- Snelle triggersnelheid: Responds to motion within 0.2 seconds via 110° PIR sensors (Front + Side Sensor).
- Fleksibele opnameopsjes: Allows manual scheduling for recording start/stop times and supports time-lapse videos and photos.
- Durable and Secure Design: IP66 rated sturdy open/close case protects against rain and dust. The camera can be password-protected and secured with a lock.
- Útwreide standby: Supports up to 512GB SD card and offers up to 12 months of standby time.

figuer 2.1: Front view of the REXING Woodlens H6 Trail Camera, showcasing its camouflage design and dual lenses.
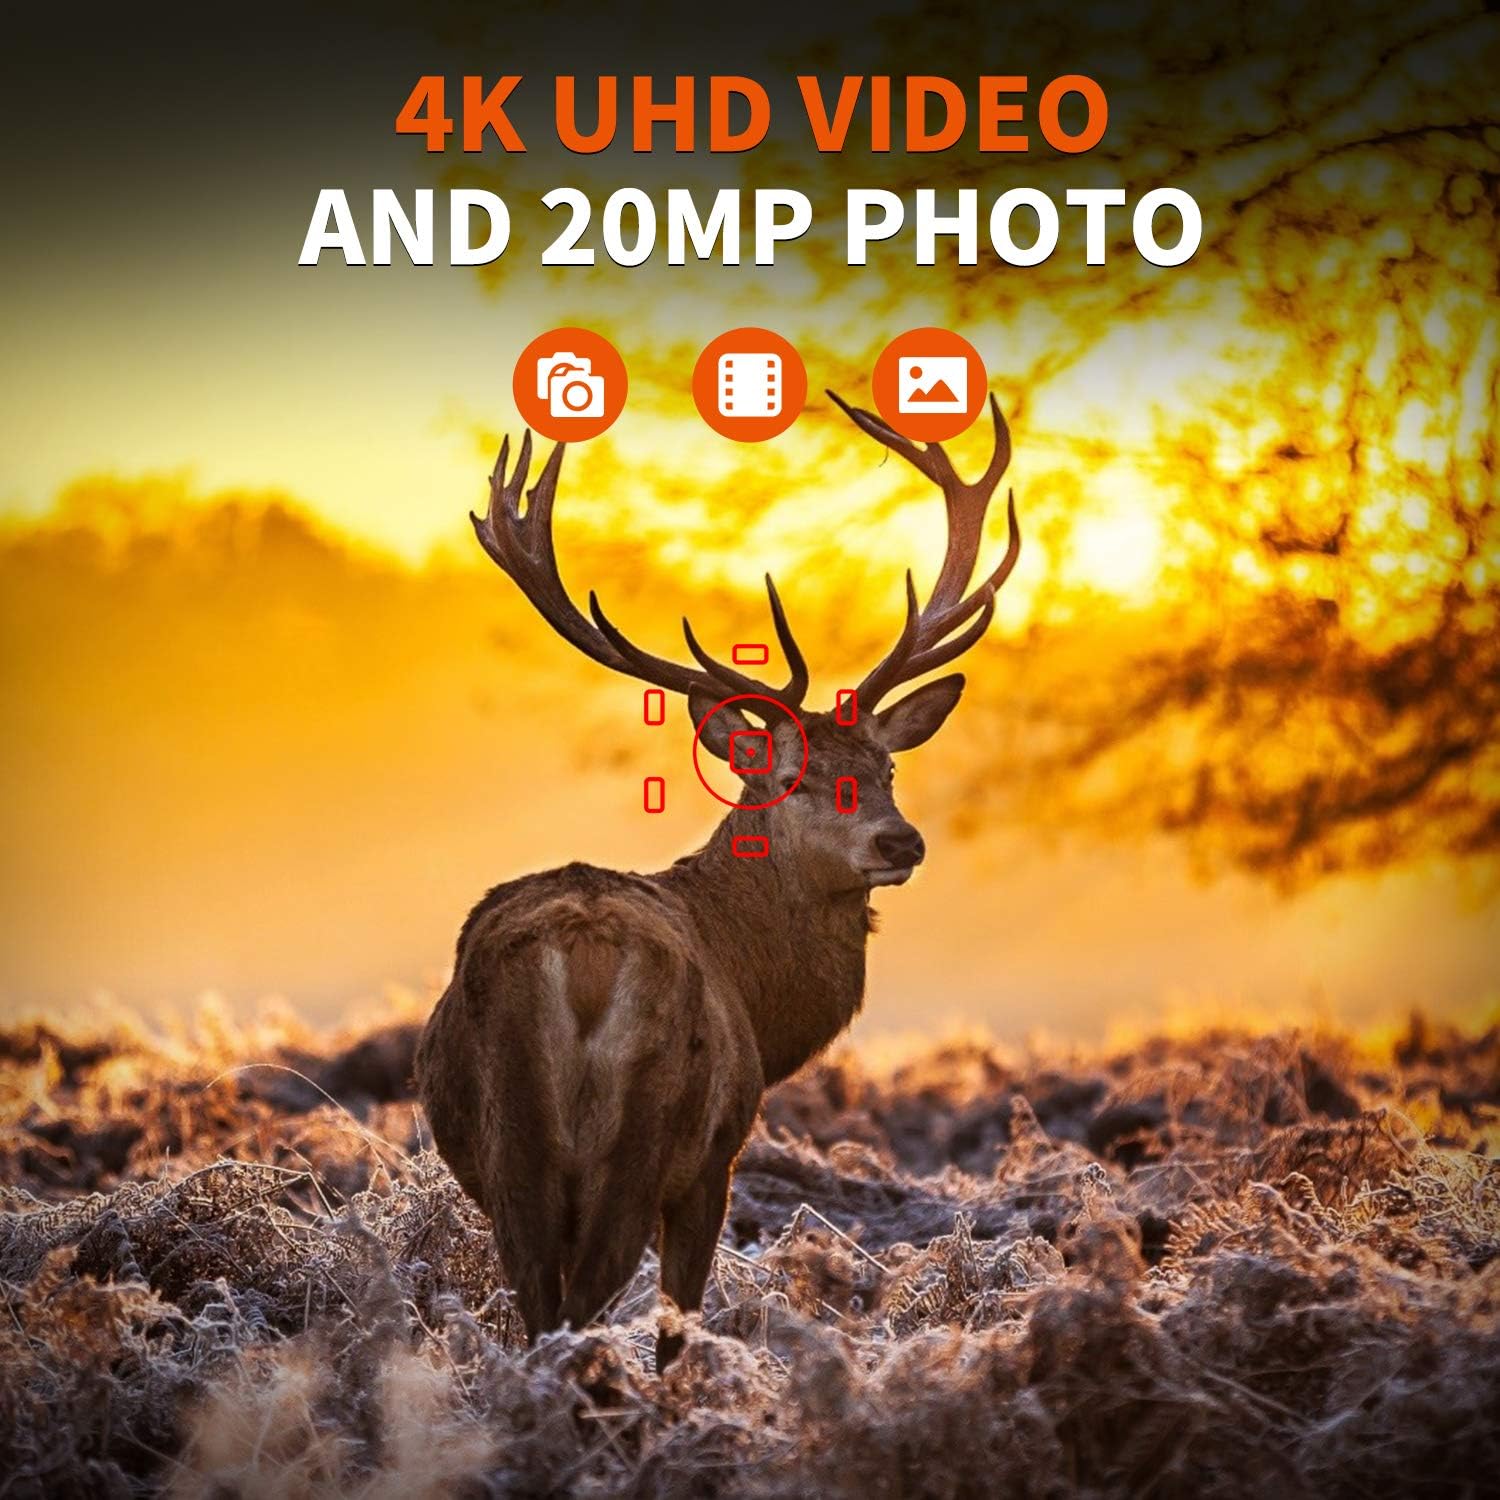
Figure 2.2: The REXING Woodlens H6 captures stunning 4K UHD video and 20MP photos, as demonstrated by this image of a deer in its natural habitat.
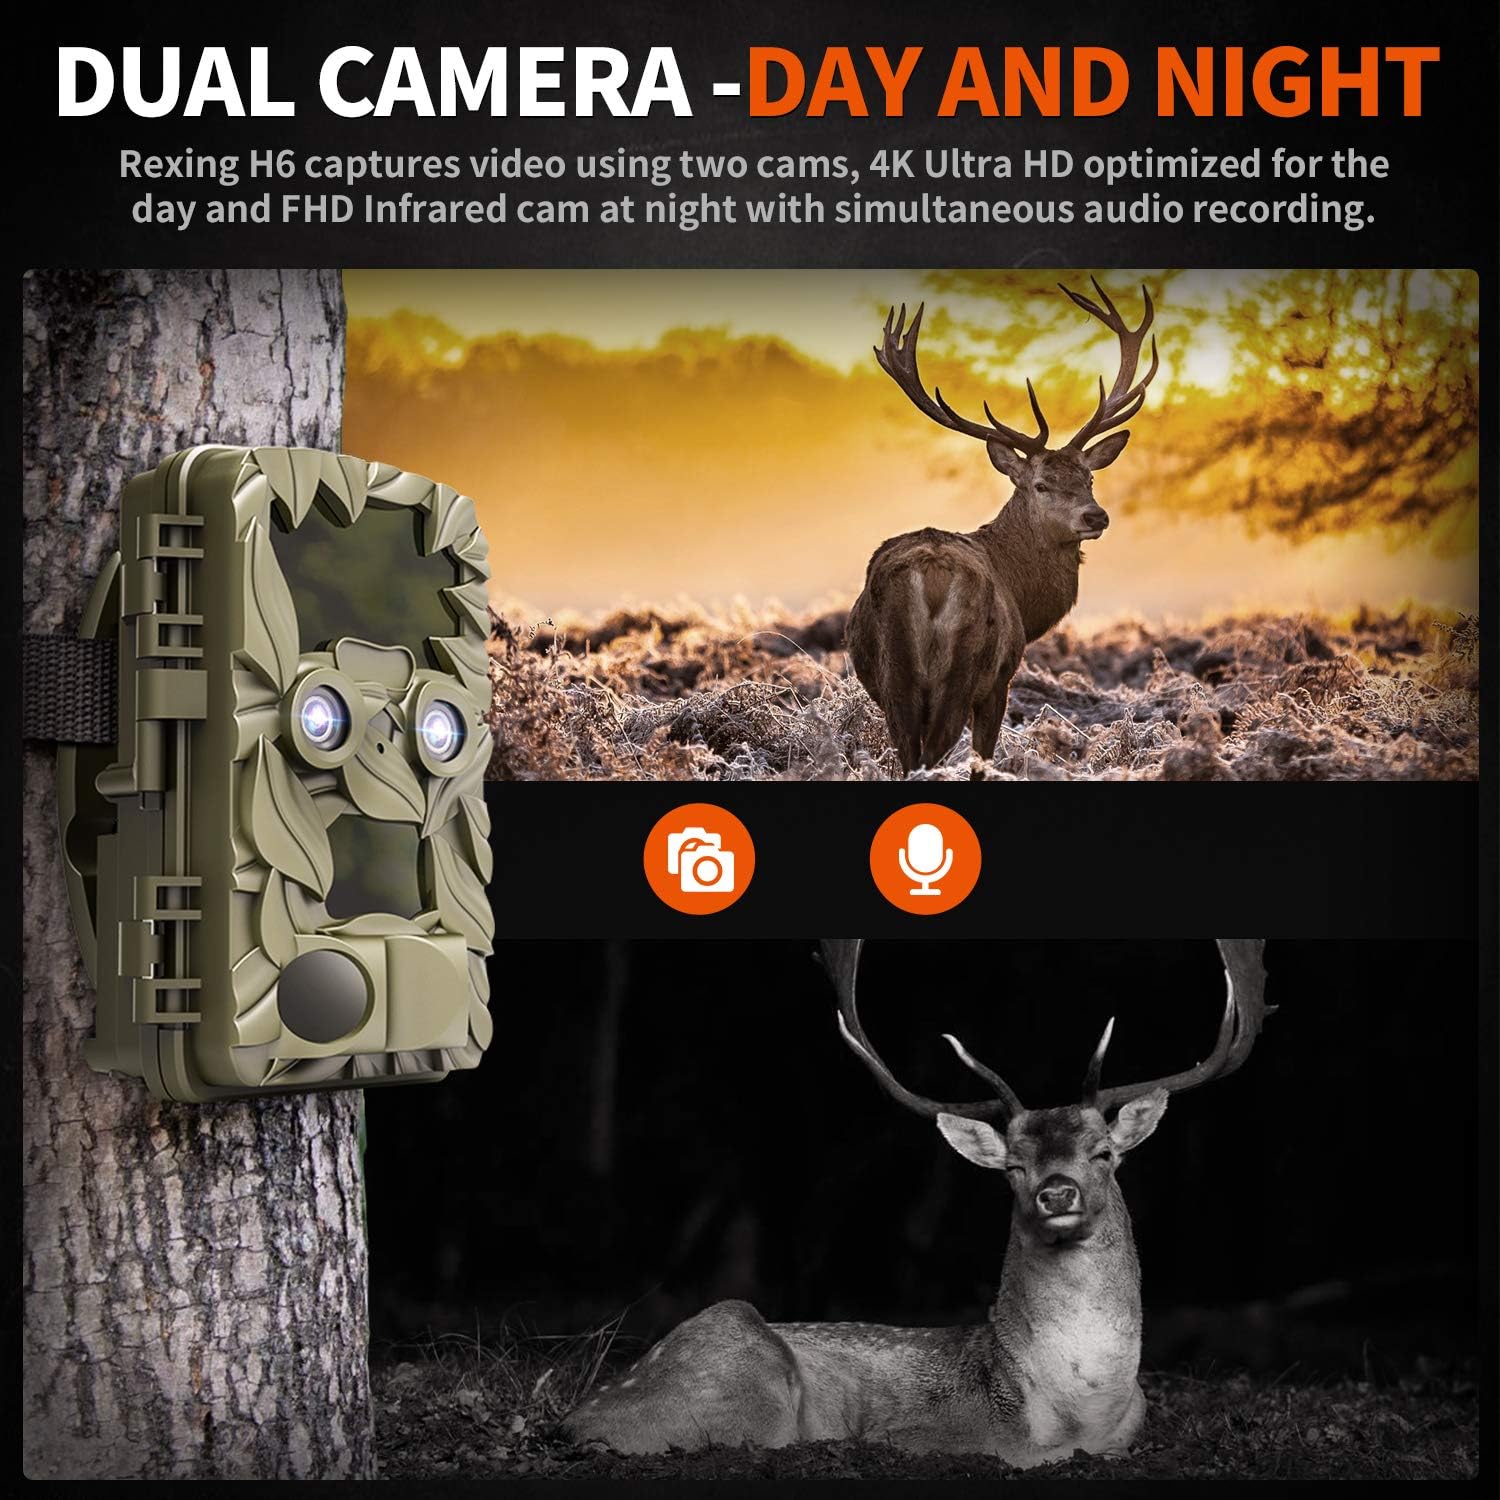
Figure 2.3: The H6 features a dual camera system, optimized for both day (4K) and night (FHD Infrared) recording, ensuring comprehensive surveillance around the clock.

Figure 2.4: Enhanced night vision capabilities of the H6, capturing clear images of wildlife up to 35 meters away in low light conditions, without disturbing sounds.

Figure 2.5: The H6 boasts a 120-degree detection angle and an ultra-fast 0.2-second trigger speed, ensuring no motion is missed.

Figure 2.6: Built to withstand the elements, the H6 is IP56 rated, making it resistant to heavy rain, ice, snow, dust, and mud.

Figure 2.7: The H6 is designed for low power consumption, compatible with 8x AA batteries, providing up to 12 months of standby time.

Figure 2.8: The REXING Woodlens H6 is versatile, suitable for multiple applications including wildlife monitoring, farm surveillance, and security.
3. Package Ynhâld
Kontrolearje asjebleaft de ynhâld fan it pakket om der wis fan te wêzen dat alle items oanwêzich binne:
- REXING Woodlens H6 Trail Camera
- Befestigingsriem
- USB Kabel
- AV kabel
- User Manual
- (Optional: 8x AA Batteries - check product packaging)
4. Opsette
4.1 Batterij Ynstallaasje
- Open the camera's outer casing troch de sydklips los te meitsjen.
- Sykje de batterij compartment.
- Doch 8x AA-batterijen yn, en soargje derfoar dat de polariteit (+/-) goed is lykas oanjûn yn it fak.
- Slút it deksel fan it batterijfak feilich.
4.2 SD-kaart ynfoegje
- Mei de kamera iepen, sykje nei de SD-kaartslot.
- Insert a compatible SD card (up to 512GB) into the slot until it clicks into place. Ensure the card is inserted in the correct orientation.
- It is recommended to format the SD card via the camera's menu before first use.
4.3 De kamera monteare
- Select a suitable location for the camera, such as a tree or pole, ensuring a clear view fan it winske gebiet.
- Thread the provided mounting strap through the slots on the back of the camera.
- Securely fasten the strap around the tree or pole, adjusting the camera's angle as needed.
- Alternatively, the camera can be wall-mounted using appropriate hardware (not included) via the mounting point.
4.4 Initial Power On
- Nei it ynstallearjen fan batterijen en SD-kaart, set de kamera op de "ON"-posysje.
- The LCD screen will power on, and you can begin configuring settings.
5. Bedriuwsinstruksjes
5.1 Navigearje troch it menu
Use the control buttons (MENU, UP, DOWN, LEFT, RIGHT, OK, SHOT) located next to the LCD screen to navigate through the camera's settings and modes.
- MENU: Jout tagong ta it haadynstellingsmenu.
- UP / DOWN: Navigearret troch menu-opsjes.
- LINKS RJOCHTS: Adjusts values or selects sub-options.
- OK: Befêstiget seleksje.
- SKOT: Manually takes a photo or starts/stops video recording in preview wize.
5.2 Opnamemodi
The H6 supports various recording modes:
- Fotomodus: Captures still images (up to 20MP).
- Fideomodus: Records video (4K UHD day, FHD night).
- Foto + fideo modus: Captures a still image followed by a video clip upon detection.
- Time Lapse Mode: Captures photos or videos at set intervals to create time-lapse sequences.
5.3 Setting Up Scheduled Recording
To set specific times for the camera to operate:
- Fier it MENU yn.
- Navigate to the "Timer" or "Schedule" setting.
- Set the desired start and end times for recording. The camera will only be active during these periods.
5.4 Viewing and Managing Recordings
Opnames kinne wêze viewed directly on the camera or on an external device:
- Ofspyljen op kamera: Use the built-in 2.4-inch LCD screen and navigation buttons to review makke foto's en fideo's.
- TV ferbining: Connect the camera to a TV using the provided AV cable to view recordings on a larger screen.
- Komputer ferbining: Connect the camera to a computer via the USB cable, or remove the SD card and insert it into a card reader, to transfer and view files.
5.5 Wachtwurdbeskerming
To prevent unauthorized access to your camera settings and recordings:
- Fier it MENU yn.
- Navigate to the "Password" or "Security" setting.
- Set a 4-digit PIN. Remember this PIN as it will be required to access the camera.
Video 5.1: Official product video demonstrating the features and operation of the REXING Woodlens H6 Trail Camera, including its dual lens capabilities, night vision, and user interface.
6. Underhâld
- Reiniging: Use a soft, dry cloth to clean the camera body and lenses. Avoid abrasive cleaners or solvents.
- Batterij ferfanging: Replace all batteries simultaneously when the low battery indicator appears to ensure optimal performance and prevent leakage.
- SD Card Management: Regularly back up important recordings and format the SD card periodically to maintain optimal recording performance and prevent data corruption.
- Opslach: As de kamera foar langere perioaden net brûkt wurdt, ferwiderje de batterijen en bewarje se op in koel, droech plak, fuort fan direkt sinneljocht.
7. Probleemoplossing
| Probleem | Mooglike oarsaak | Oplossing |
|---|---|---|
| Kamera giet net oan. | Lege of lege batterijen; ferkearde batterijynstallaasje. | Ferfang alle batterijen mei nije, en soargje derfoar dat de polariteit korrekt is. |
| Camera stops functioning after installation / No data recorded. | SD card full or corrupted; incorrect SD card insertion; camera settings preventing recording. | Format the SD card (backup data first); ensure SD card is properly inserted; check recording mode and schedule settings. Ensure sufficient battery power. |
| Minne ôfbylding/fideokwaliteit nachts. | IR lights obstructed; subject too far; low battery affecting IR performance. | Ensure clear line of sight for IR lights; position camera closer to subjects (within 65ft); replace batteries. |
| Camera not triggering motion. | PIR sensor obstructed; sensitivity setting too low; subject outside detection range. | Clear obstructions from PIR sensors; increase PIR sensitivity in settings; ensure subjects pass within the 110° detection angle. |
| Camera screen counts down and switches off. | This is normal behavior for the camera to enter monitoring mode after a brief display. | No action required. The camera is functioning as designed. |
| No Wi-Fi connectivity. | The REXING Woodlens H6 model does not feature Wi-Fi connectivity. | This model requires direct connection via AV/USB cable or SD card removal for data transfer. |
8. Spesifikaasjes
| Eigenskip | Detail |
|---|---|
| Merk | REXING |
| Model | H6 |
| Video Capture Resolúsje | 2160p (4K UHD) |
| Effektive noch resolúsje | 20 MP |
| Foto Sensor Technology | CMOS |
| Nachtfisy | 35M IR Flash, Double 850nm High Powered Infrared Light |
| PIR -opspoaringshoeke | 110° (Front + Side Sensor) |
| Triggersnelheid | 0.2 sekonden |
| Skerm | Built-in 2.4-inch LCD |
| Opslach | SD-kaart (oant 512GB) |
| Power Boarne | 8x AA Batteries (12 Month Standby) |
| Konnektivität | AV Output, USB |
| Ynternasjonale beskerming Rating | IP66 |
| Item Package Ofmjittings | 7.68 x 4.92 x 3.9 inch |
| Pakket Gewicht | 0.61 kilogram |
| UPC | 810046601815 |
9. Garânsje en stipe
For warranty information and technical support, please refer to the official REXING webside of nim direkt kontakt op mei harren klanttsjinst. Bewarje jo oankeapbewiis as bewiis fan oankeap foar alle garânsjeclaims.
Kontakt ynformaasje:
- Website: www.rexingusa.com (Kontrolearje asjebleaft de offisjele website for the most current information)
- E-post: Ferwize nei de webside foar stipe-e-post.
- Tillefoan: Ferwize nei de webside foar stipe tillefoannûmer.