
1. Ynlieding
The Dynatron A42 1U Active Air Cooler is designed for high-performance AMD Ryzen Socket AM4 and AM5 processors. This compact, side-blower PWM fan provides efficient heat dissipation for CPUs up to 95 Watts in 1U server environments. The Dynatron A42 ensures optimal system performance by maintaining appropriate operating temperatures.
Key Features:
- Recommended for AMD Ryzen Processors, Socket AM4 and AM5.
- Supports CPU power up to 95 Watts heat dissipation.
- Features an 80x80x13mm PWM Fan and Copper Fin construction.
- Active Air Cooler suitable for 1U Server and Up.
- Overall dimensions: 110.0mm (L) x 85.0mm (W) x 27.3mm (H).
2. Package Ynhâld
Kontrolearje oft alle ûnderdielen yn it pakket oanwêzich binne foardat jo trochgean mei de ynstallaasje:
- Heatsink gearkomste
- PWM Fan (integrated)
- Power Kabel
- Mounting Connectors/Screws
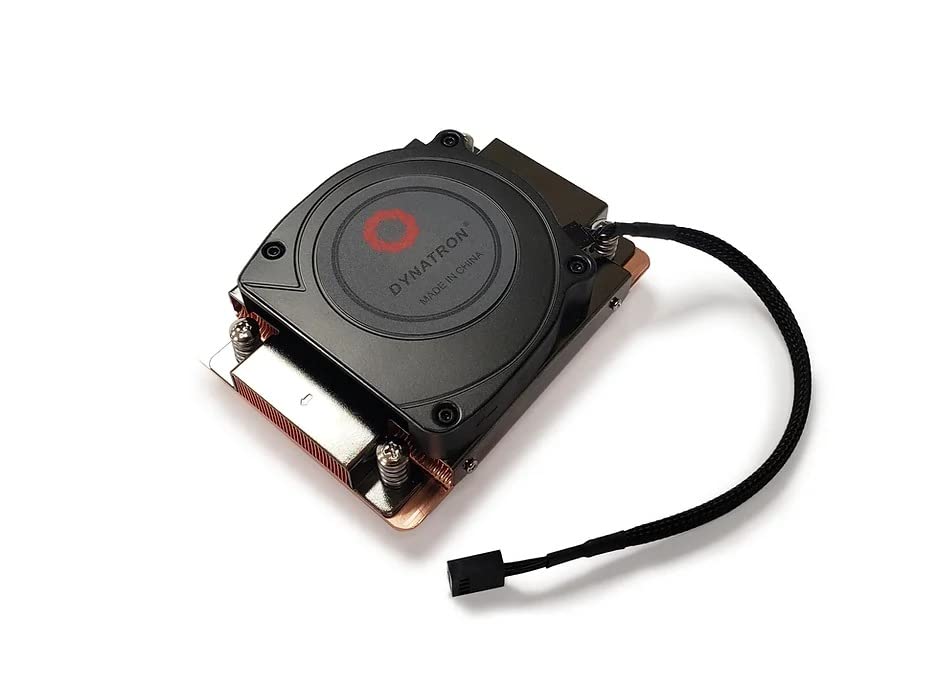
Ofbylding 2.1: Boppe view of the Dynatron A42 CPU Cooler, showing the integrated fan and Dynatron branding.
3. Opset en ynstallaasje
Follow these steps carefully to install the Dynatron A42 CPU Cooler on your AMD AM4 or AM5 motherboard.
- It moederbord tariede: Ensure your motherboard is compatible with AMD AM4 or AM5 sockets. Remove any existing CPU cooler and clean the CPU surface thoroughly with isopropyl alcohol to remove old thermal paste.
- Termyske paste tapasse: Apply a small, pea-sized amount of high-quality thermal paste to the center of the CPU's integrated heat spreader (IHS). Avoid applying excessive amounts, as this can lead to reduced cooling performance or unintended residue.
- Position the Cooler: Carefully align the Dynatron A42 cooler with the mounting holes on the motherboard around the CPU socket. The cooler's base should make even contact with the CPU's IHS.
- Secure the Cooler: Use the provided mounting screws to secure the cooler to the motherboard. Tighten the screws in a diagonal pattern (e.g., top-left, bottom-right, top-right, bottom-left) gradually until the cooler is firmly seated. Do not overtighten.
- Ferbine de ventilatorkabel: Locate the 4-pin PWM fan header on your motherboard (typically labeled "CPU_FAN"). Connect the cooler's 4-pin fan cable to this header. Ensure the connector is fully seated.
- Finale kontrôle: Double-check all connections and ensure the cooler is securely mounted and does not wobble.

Ofbylding 3.1: Underkant view of the Dynatron A42 CPU Cooler, showing the copper base and pre-applied thermal paste (if applicable) or area for application.

Image 3.2: Dynatron A42 CPU Cooler with indicated dimensions for reference during installation.
4. Bedriuwsrjochtlinen
Once installed, the Dynatron A42 operates automatically, controlled by your motherboard's PWM fan settings. For optimal performance and longevity:
- BIOS/UEFI-ynstellings: Access your system's BIOS/UEFI to ensure the CPU fan control is set to PWM mode for dynamic fan speed adjustment based on CPU temperature.
- Temperatuermonitoring: Regularly monitor your CPU temperatures using system monitoring software to ensure they remain within safe operating limits, especially under heavy load.
- Luchtstream: Ensure adequate airflow within your server chassis. Proper case ventilation is crucial for the cooler's effectiveness.
5. Underhâld
Regular maintenance helps ensure the longevity and optimal performance of your CPU cooler.
- Stof fuortsmite: Periodically (every 3-6 months, depending on environment) use compressed air to clean dust from the fan blades and heatsink fins. Ensure the fan is not spinning during cleaning to prevent damage.
- Termyske pasta: If CPU temperatures rise significantly over time, consider reapplying thermal paste. This typically involves removing the cooler, cleaning both the CPU and cooler base, and applying fresh thermal paste.
- Fan ynspeksje: Check the fan for any signs of wear, unusual noise, or obstructions. Replace the fan if it becomes excessively noisy or stops functioning correctly.
6. Probleemoplossing
If you encounter issues with your Dynatron A42 CPU Cooler, refer to the following common problems and solutions:
- Hege CPU-temperatueren:
- Soargje derfoar dat de koeler feilich monteard is en folslein kontakt makket mei de CPU.
- Verify that thermal paste was applied correctly and not excessively.
- Check for dust buildup on the heatsink and fan.
- Confirm proper case airflow and ventilation.
- Ensure the fan is spinning and connected to the correct motherboard header.
- Fan Not Spinning or Making Noise:
- Check the 4-pin fan cable connection to the motherboard.
- Inspect for any obstructions preventing the fan blades from rotating.
- Kontrolearje de ynstellings fan 'e fan yn BIOS/UEFI.
- If the fan is making grinding or clicking noises, it may be faulty and require replacement.
- Installation Difficulties:
- Refer to the installation steps in Section 3.
- Ensure you are using the correct mounting hardware for your socket type (AM4/AM5).
7. Spesifikaasjes
| Eigenskip | Spesifikaasje |
|---|---|
| Produkt Ofmjittings | 3.35"L x 1.07"B x 4.33"H (110.0 x 85.0 x 27.3 mm) |
| Merk | Dynatron |
| Stromkonnektortype | 4-pinsje PWM |
| Voltage | 12 Volt |
| Wattage (TDP Support) | 95 watt |
| Cooling metoade | Loft |
| Kompatibele apparaten | Desktop (AMD AM4, AM5 Sockets) |
| Noise Level | 62 Desibel (Maks.) |
| Materiaal | Koper Fin |
| Maksimum Rotational Speed | 2500 RPM |
| Luchtstreamkapasiteit | 26.25 kubike fuotten per minút |
| Item Gewicht | 1 pûn |
| Model Number | A42 (840556075493) |
8. Warranty Information
Dynatron products are manufactured to high-quality standards. Specific warranty terms and conditions may vary by region and retailer. Please refer to the warranty documentation included with your purchase or visit the official Dynatron webside foar detaillearre garânsjeynformaasje en registraasjeprosedueres. Bewarje jo oankeapbewiis foar garânsjeclaims.
9. Stipe
For technical assistance, product inquiries, or further support, please visit the official Dynatron website or contact their customer service department. Online resources, FAQs, and driver downloads may also be available on the manufacturer's website.
Offisjeel Website: www.dynatron.com (Please check for the most current contact information and support resources.)