1. Ynlieding
This manual provides detailed instructions for the installation, operation, maintenance, and troubleshooting of the Fydun ZL-7901A Incubator Controller. This device is designed for precise and automatic control of temperature and humidity in various incubation environments, ensuring optimal conditions for successful hatching.
2. Produkt Overview
The Fydun ZL-7901A is a high-precision digital incubator controller capable of managing both temperature and humidity. It features a clear display and intuitive controls for easy programming and monitoring.
Key Features:
- Krekte kontrôle: High-accuracy temperature and humidity regulation for stable incubator environments.
- Strong Anti-interference: Designed for reliable operation in various conditions.
- High Stability and Accuracy: Ensures consistent performance for critical incubation processes.
- Wide applikaasje: Suitable for a variety of eggs including chicken, duck, goose, pigeon, quail, parrot, and peacock.
- Automatyske operaasje: Fully automatic control reduces manual intervention.
Komponinten:

Ofbylding 2.1: Front view of the Fydun ZL-7901A Incubator Controller, showing the display and control buttons.

Ofbylding 2.2: The ZL-7901A controller packaged with its temperature and humidity sensors and connecting cables.

Ofbylding 2.3: The ZL-7901A controller shown in an incubator environment, demonstrating its application for egg incubation.
3. Safety Information
- Lês alle ynstruksjes soarchfâldich foar ynstallaasje en operaasje.
- Soargje derfoar dat de macht oanbod voltage matches the controller's requirements (100V-240V).
- All wiring should be performed by a qualified professional to prevent electrical hazards.
- Do not expose the controller to water or excessive moisture.
- Hâld it apparaat fuort fan brânbere materialen.
- Skeakelje de stroom út foardat jo ûnderhâld of bedrading feroarje.
- Dit apparaat is gjin boartersguod. Bûten berik fan bern hâlde.
4. Opset en ynstallaasje
4.1 Montearje de kontrôler
The ZL-7901A controller is designed for panel mounting. Ensure a secure and stable location within your incubator setup.

Ofbylding 4.1: Side view illustrating the mounting bracket for panel installation.
4.2 Wiring Ferbinings
Carefully connect the power supply, sensors, and output devices (heater, humidifier, fan, egg turner) to the appropriate terminals on the back of the controller. Refer to the wiring diagram provided with your product for specific connections. Ensure all connections are tight and secure.

Ofbylding 4.2: Rear view of the controller, showing the terminal blocks for electrical connections.
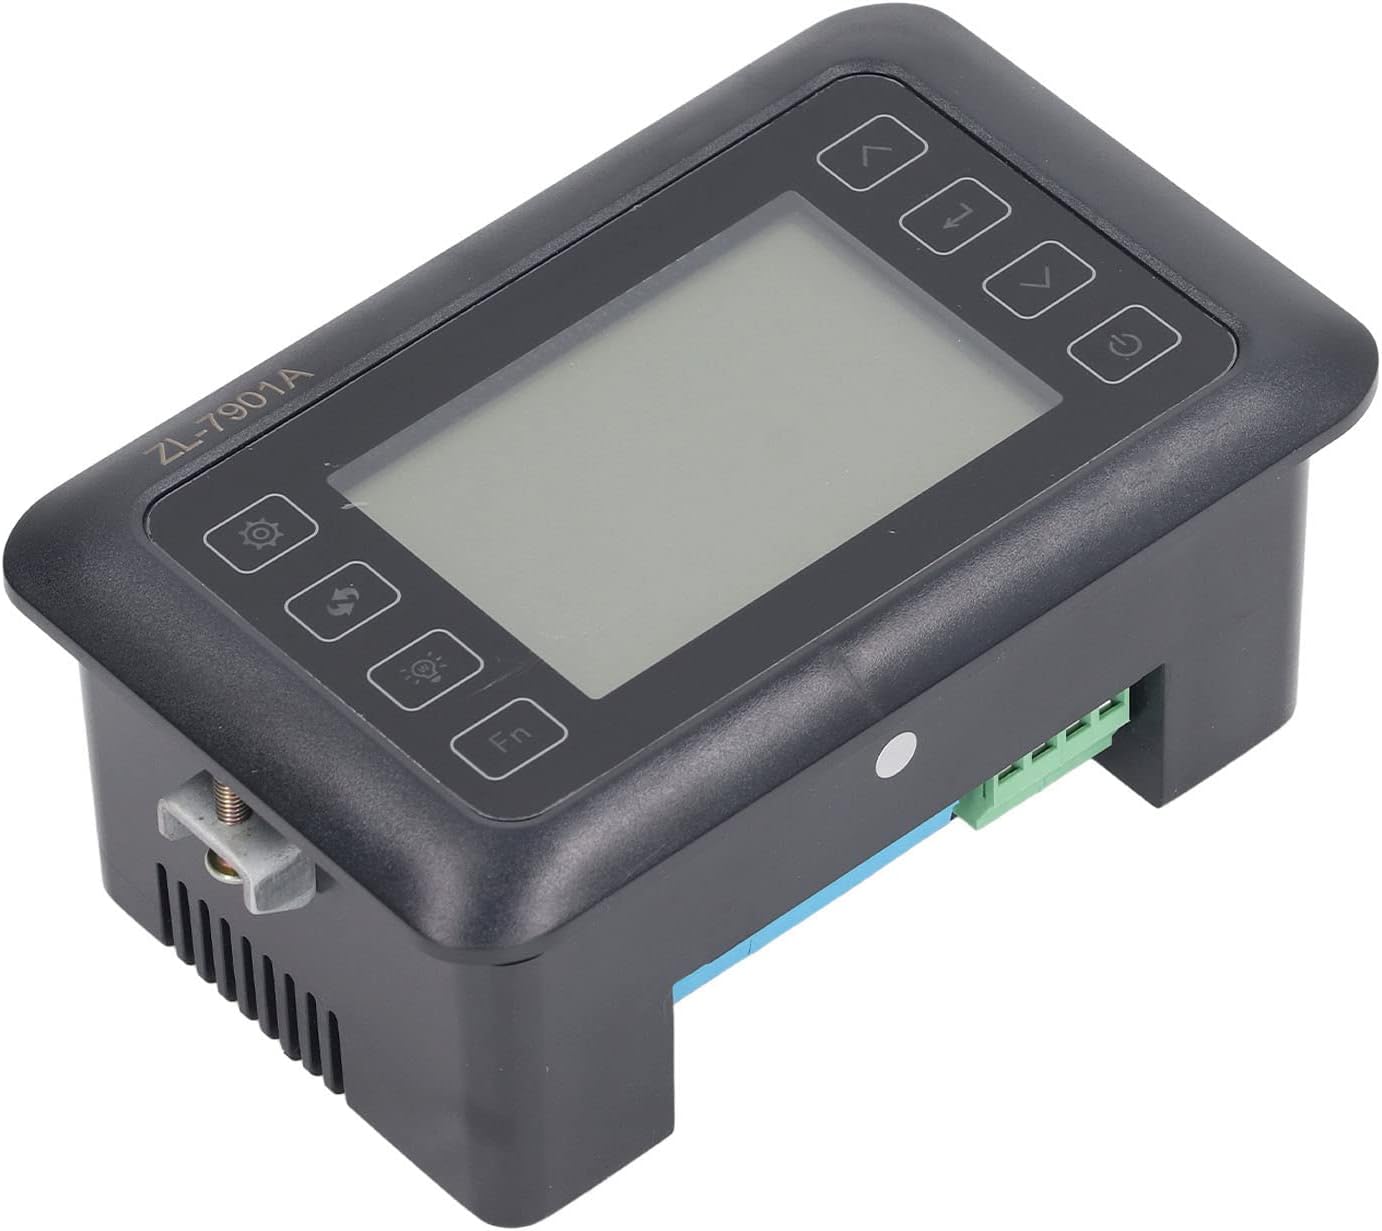
Ofbylding 4.3: Angled view highlighting the various connection points on the controller's side.
After all connections are made, double-check them for correctness before applying power.
5. Bedriuwsinstruksjes
5.1 Power On / Off
Druk op de Power knop to turn the controller on or off. The display will illuminate upon power-on. The power button is located on the right side of the controller's front panel.
5.2 Display oerview
The main display shows the current temperature and humidity readings. Additional indicators may show the status of heating, humidifying, and turning functions.
5.3 Ynstelle Parameters
- Druk op de Ynstellings knop (gear icon) to enter the parameter setting mode. This button is on the left side of the controller's front panel.
- Brûk de Up (pyl omheech) en Omleech (down arrow) buttons to navigate through different parameters (e.g., target temperature, target humidity, egg turning interval). These buttons are on the right side of the controller's front panel.
- Druk op de Enter knop (return arrow icon) to select a parameter for editing. This button is on the right side of the controller's front panel.
- Brûk de Up en Omleech knoppen om de wearde oan te passen.
- Druk op de Enter knop wer om de nije wearde te befêstigjen.
- Repeat for all desired parameters.
- Exit the setting mode by pressing the Ynstellings knop again or waiting for a timeout.
Noat: Consult the full product manual (if provided separately) for a complete list of parameters and their functions.
5.4 Funksje Knoppen
- Ljochtknop (light bulb icon): Controls the internal light of the incubator (if connected). This button is on the left side of the controller's front panel.
- Fn knop: Activates special functions or enters advanced settings. Refer to the detailed manual for specific Fn button operations. This button is on the left side of the controller's front panel.
6. Underhâld
6.1 Cleaning
- Ensure the controller is powered off and disconnected from the power source before cleaning.
- Feie de bûtenkant fan 'e controller ôf mei in sêfte, droege doek.
- Brûk gjin abrasive reinigingsmiddelen, oplosmiddels en dompel it apparaat net yn wetter.
- Keep the sensor probes clean and free from debris to ensure accurate readings.
6.2 Sensorsoarch
Handle the temperature and humidity sensors with care. Avoid bending or damaging the cables. If readings appear inaccurate, gently clean the sensor tips. Do not attempt to disassemble the sensors.
7. Probleemoplossing
| Probleem | Mooglike oarsaak | Oplossing |
|---|---|---|
| Controller giet net oan. | No power supply; loose connection; faulty power cable. | Check power outlet; ensure all connections are secure; test power cable. |
| Unkrekte temperatuer-/fochtigensmjittingen. | Sensor dirty or damaged; sensor not properly placed; calibration needed. | Clean sensor; reposition sensor away from direct airflow/heat; refer to advanced settings for calibration (if available). |
| Heater/Humidifier not activating. | Output device not connected; setpoint not reached; faulty output device. | Verify wiring connections; check setpoint values; test heater/humidifier independently. |
| Display toant flaterkoade. | Sensor fault; internal error. | Note the error code and consult the full product manual or contact support. |
8. Spesifikaasjes
| Eigenskip | Detail |
|---|---|
| Model | ZL-7901A |
| Merk | Fydun |
| Ynfier Voltage | 100V-240V AC |
| Control Type | Fully Automatic Digital Temperature and Humidity Control |
| Krektens | High precision for both temperature and humidity |
| Oanfraach | Incubators for various poultry and bird eggs |
| Montage | Panel Mount |
9. Garânsje en stipe
Fydun is committed to providing quality products and excellent customer service. If you encounter any issues or have questions regarding your ZL-7901A Incubator Controller, please contact our customer service team.
For support, please refer to the contact information provided with your purchase or visit the official Fydun store on Amazon: Fydun Amazon Store.
Our professional customer service team is ready to assist you promptly.