
1. Ynlieding
Thank you for choosing the Perlegear Tilting TV Wall Mount. This manual provides essential information for the safe and correct installation, operation, and maintenance of your TV wall mount. Please read all instructions carefully before installation and keep this manual for future reference.
2. Safety Information
WARSKÔGING: It net lêzen en folgjen fan alle ynstruksjes kin liede ta persoanlik letsel, skea oan eigendom of it ferfallen fan 'e garânsje.
- Do not begin installation until you have read and understood all instructions and warnings contained in this manual.
- Soargje derfoar dat it montage-oerflak it kombineare gewicht fan 'e apparatuer en alle oansletten hardware feilich kin drage.
- This product is designed for installation on wood stud walls, solid concrete walls, or brick walls. Do NOT install on drywall alone.
- Brûk altyd in studfiner om houten studs sekuer te lokalisearjen.
- Use appropriate safety gear and tools for installation.
- If you have any questions or concerns, contact Perlegear customer service.
3. Package Ynhâld
Verify that all components are present and undamaged before installation. If any parts are missing or defective, contact Perlegear for assistance.

Ofbylding: Oerview of all components included in the Perlegear Tilting TV Wall Mount kit, including the wall plate, TV brackets, various screws, washers, spacers, a bubble level, and an Allen wrench.
- Wall Plate Assembly: Main frame that attaches to the wall.
- TV Brackets (2x): Attach to the back of your TV.
- Hardware Kit: Includes various screws (M4, M6, M8), washers, spacers, and wall anchors for different TV models and wall types.
- Bubble nivo: For ensuring accurate horizontal alignment during installation.
- Allen Wrench: For tilt and leveling adjustments.
- Kabelbinders: Foar kabel behear.
- Instruction Manual & Drilling Template: Guides for installation.
4. Spesifikaasjes
| Eigenskip | Spesifikaasje |
|---|---|
| Mounting Type | Wall Mount |
| Beweging Type | Tilt |
| Merk | Perlegear |
| Materiaal | Alloy Staal |
| Kleur | Swart |
| Kompatibele apparaten | Televyzje |
| Maksimum Tilt Angle | 15 graden |
| Maximum Supported Screen Size | 90 ynms |
| Minimum Supported Screen Size | 42 ynms |
| Max load kapasiteit | 132 lbs |
| VESA-kompatibiliteit | 200x100mm oant 800x400mm |
| Ofstân tusken muorrebalken | 12"/16"/18"/24" |
5. Opset en ynstallaasje
Pre-ynstallaasje Checklist:
- TV grutte: Compatible with 42-90 inch TVs.
- TV gewicht: Ensure your TV weighs no more than 132 lbs (60 kg).
- VESA patroan: Check the VESA mounting holes on your TV. This mount supports patterns from 200x100mm to 800x400mm.
- Muorretype: Suitable for wood stud (12"/16"/18"/24" spacing), solid concrete, and brick walls. Do NOT install on drywall alone.
Stap foar stap ynstallaasje:

Image: Visual guide illustrating the wide compatibility of the Perlegear TV mount with various TV sizes (42-90 inches), maximum load capacity (132 lbs), VESA patterns (200x100mm to 800x400mm), and supported wall types (concrete, wood studs, brick).
- Befestigje tv-beugels oan tv:
- Carefully place your TV face-down on a soft, clean surface.
- Align the TV brackets with the mounting holes on the back of your TV.
- Select the appropriate screws, washers, and spacers from the hardware kit that fit your TV's VESA holes.
- Securely fasten the TV brackets to the TV using a screwdriver. Ensure they are tight but do not overtighten.

Image: Close-up of the TV brackets being attached to the rear of a television, showing the alignment with VESA holes and the use of mounting hardware.
- Befestigje muorreplaat oan muorre:
- Use the provided drilling template to mark the pilot hole locations on your wall. Ensure the template is level using the included bubble level.
- Drill pilot holes according to the template and your wall type (wood stud, concrete, or brick).
- Attach the wall plate assembly to the wall using the appropriate lag bolts and washers. For concrete/brick, insert wall anchors first.
- Draai alle bouten feilich oan.
Video: A quick demonstration of the Perlegear TV wall mount installation process, showing the wall plate being secured to the wall and the TV being hung. This video provides a concise overview of the main steps.
- Hang Your TV:
- With assistance, carefully lift the TV (with brackets attached) and hook the brackets onto the top edge of the wall plate.
- Gently lower the TV until the brackets engage with the wall plate.
- Pull down the quick-release straps to lock the TV securely onto the wall plate. Ensure both straps are engaged.

Image: A visual breakdown of the easy 3-step installation process: 1. Attach TV brackets, 2. Mount wall plate, 3. Hang your TV. This image simplifies the installation overview.
6. Bedriuwsinstruksjes
Kantelferstelling:
The Perlegear Tilting TV Wall Mount allows for a +5° to -15° tilt range to reduce glare and optimize viewyn hoeken.
- To adjust the tilt, loosen the orange knobs on the TV brackets.
- Tilt de TV nei jo winske hoeke.
- Tighten the orange knobs to secure the TV in place.
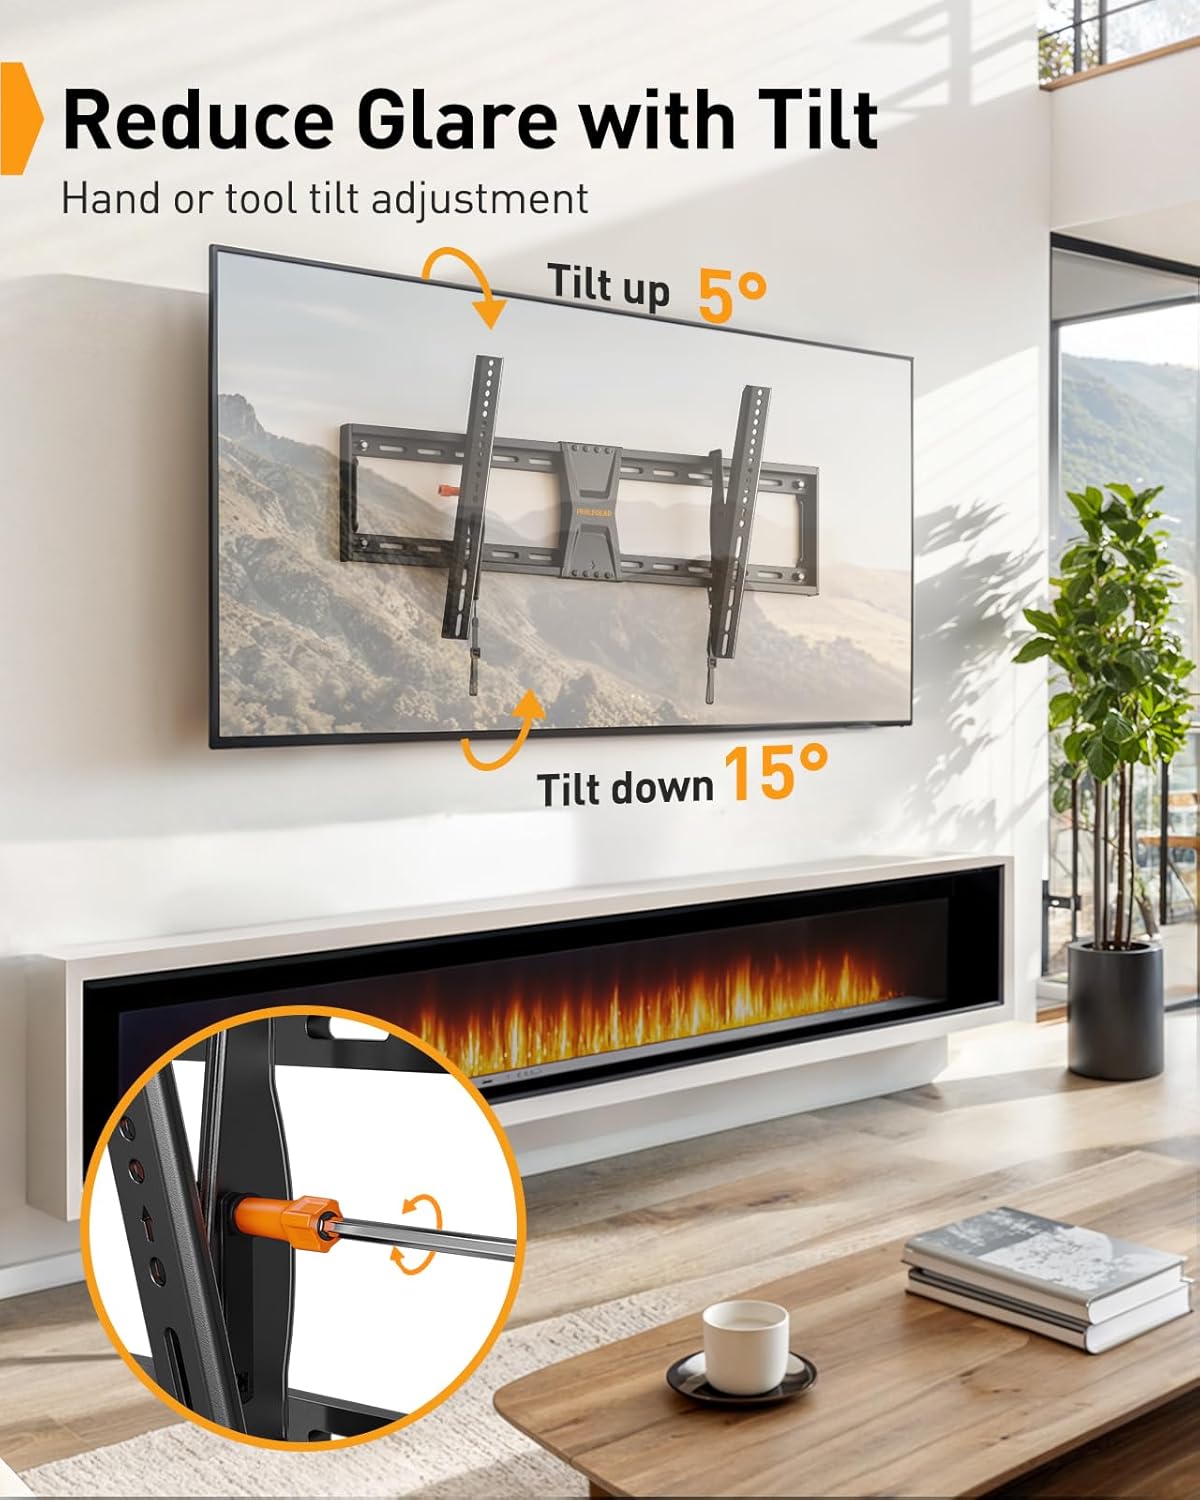
Image: A television mounted on the wall, demonstrating the +5° tilt up and -15° tilt down capabilities of the Perlegear mount, with an inset showing the orange knob for manual adjustment.
Nivelleringsoanpassing:
Fine-tune your TV's horizontal alignment even after installation with a ±2° leveling adjustment.
- Use the provided Allen wrench to adjust the leveling screws on the TV brackets.
- Rotate the screws until the TV is perfectly level.

Image: A television mounted on the wall, showing the ±2° leveling adjustment feature. An inset highlights the mechanism for fine-tuning the TV's horizontal alignment after installation.
Horizontale ferskowing:
The TV can be shifted horizontally on the wall plate to center it for optimal viewing.
- Gently slide the TV along the wall plate to achieve your desired centered position.
- The anti-drop edges on the wall plate prevent the TV from accidentally slipping off.
7. Underhâld
- Periodically check that all screws and connections are tight and secure.
- Clean the mount with a soft, dry cloth. Avoid abrasive cleaners.
8. Probleemoplossing
De tv stiet net op ien line:
- Use the Allen wrench to adjust the leveling screws on the TV brackets (refer to Operating Instructions).
TV feels loose or unstable:
- Ensure all wall plate bolts are securely tightened into the wall studs or anchors.
- Verify that the TV brackets are properly hooked onto the wall plate and the quick-release straps are engaged and locked.
- Confirm your TV's weight does not exceed the 132 lbs (60 kg) maximum load capacity.
9. Garânsje en stipe
This Perlegear TV Wall Mount comes with a 2-jierrige fabrikant garânsje.
For technical support, missing parts, or any questions, please contact Perlegear customer service:
- E-post: support@perlegear.com
- Phone (US/CA): 1-800-456-5231 (Mon-Fri, 8am-8pm CST)
- Telefoan (UK): 44-808-196-4165 (Mon-Fri, 2pm-10pm UTC)
- Website: www.perlegear.com