1. Wichtige Safety Ynstruksjes
Please read all instructions carefully before using the Teesa Steam Mop TSA5051. Keep this manual for future reference.
- Always ensure the appliance is unplugged before filling the water tank or performing maintenance.
- Do not leave the steam mop unattended while powered on.
- Hâld bern en húsdieren fuort fan it apparaat tidens wurking.
- Brûk allinich destillearre of demineralisearre wetter yn 'e tank om mineraalopbou te foarkommen.
- Rjochtsje gjin stoom op minsken, bisten of elektryske apparaten.
- Avoid using the steam mop on unsealed hardwood floors or surfaces that are sensitive to heat and moisture.
- Always attach a cleaning pad before operating the steam mop.
- As it netsnoer skansearre is, moat it ferfongen wurde troch de fabrikant, syn tsjinstferliener, of ferlykbere kwalifisearre persoanen om in gefaar te foarkommen.
2. Produkt Overview en komponinten
Familiarize yourself with the parts of your Teesa Steam Mop TSA5051 before assembly and operation.

Ofbylding 2.1: Fully assembled Teesa Steam Mop TSA5051, front view.

Ofbylding 2.2: Side view of the steam mop, showing the handle and power cord wrap.

Ofbylding 2.3: The detachable handheld steam unit.

Ofbylding 2.4: Illustration of detaching the handheld unit from the main body.
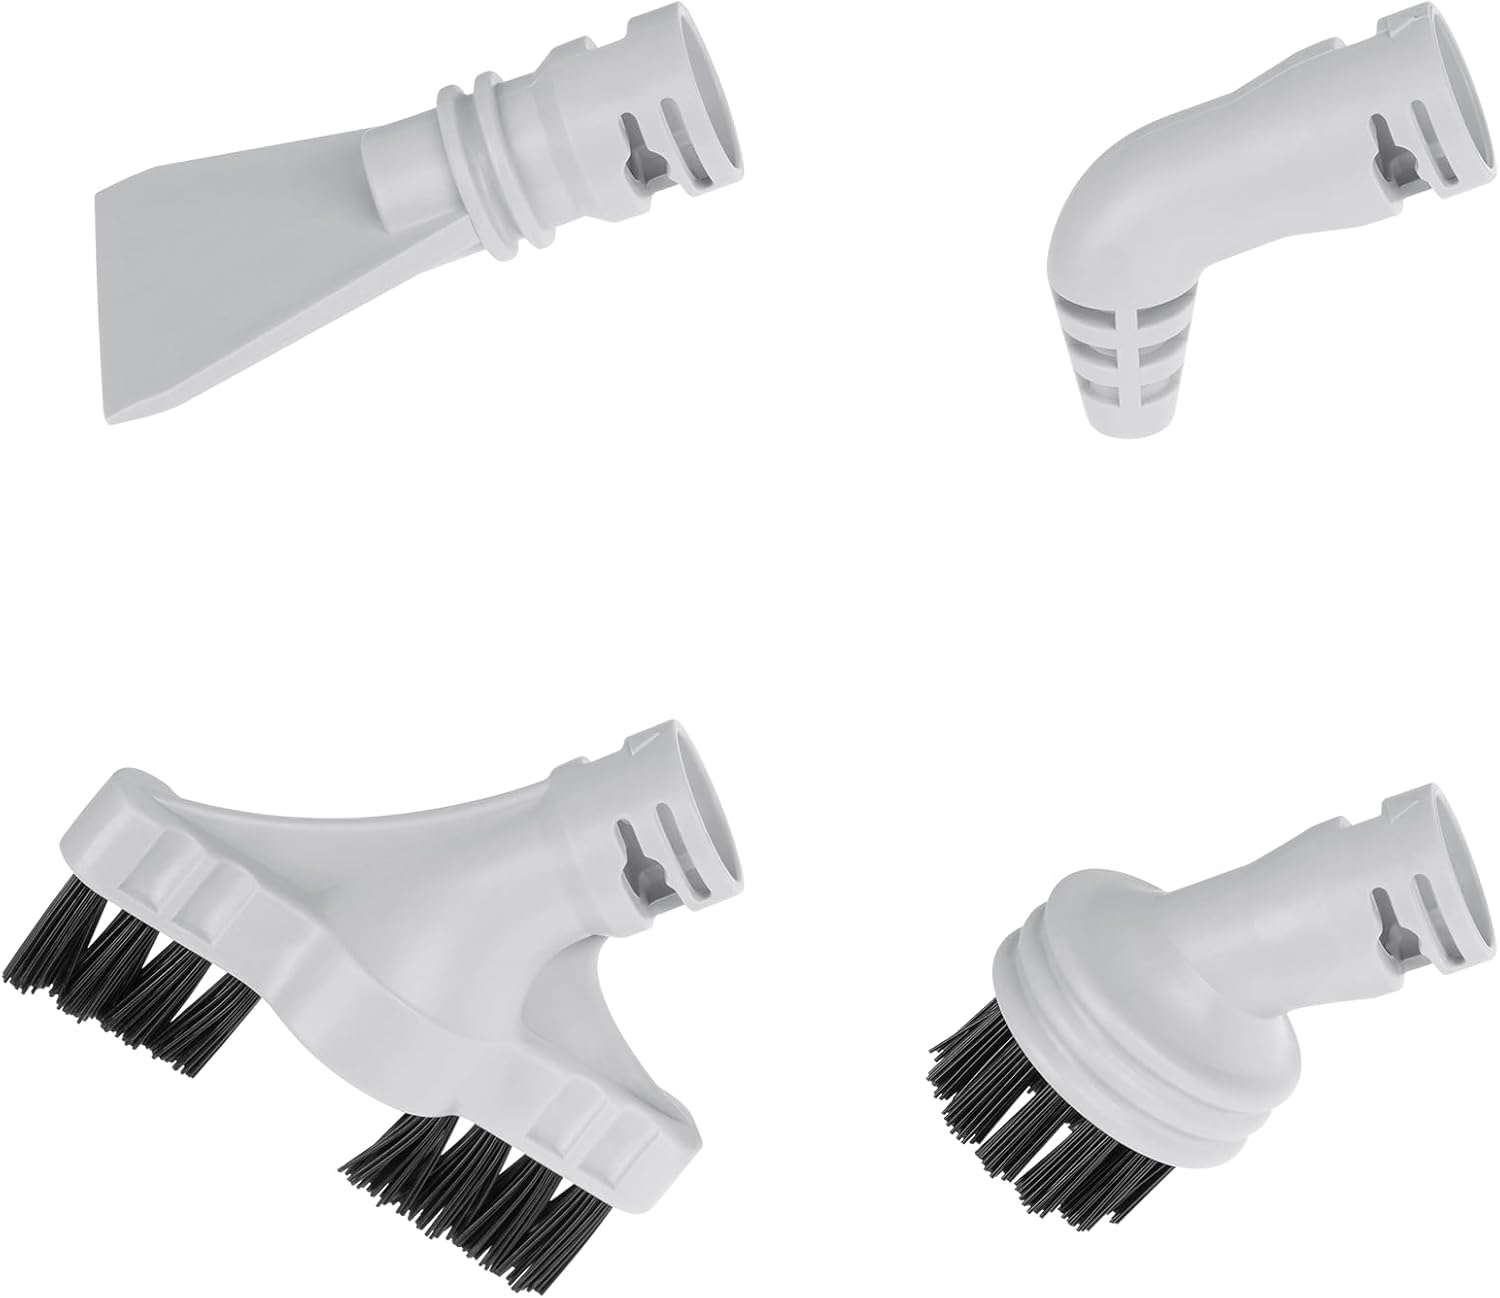
Ofbylding 2.5: Included accessories: round brush, joint accessory, slot nozzle, scraper.

Ofbylding 2.6: Measuring cup for water and adapter for accessories.

Ofbylding 2.7: Two sponge cloths (mop pads) and the carpet glider frame.
Ynbegrepen komponinten:
- Main Steam Mop Unit (with detachable handheld steamer)
- Handle Assembly
- 2 x Sponge Cloths (Mop Pads)
- Mjitbeker
- Accessoire adapter
- Rûne boarstel
- Joint Accessory
- Slot Nozzle
- Scraper
- Carpet Glider Frame
3. Opset en gearkomste
- De hânfet gearstalle: Insert the handle assembly into the main steam mop unit until it clicks securely into place.
- Reinigingspad oanmeitsje: Place one of the sponge cloths onto the bottom of the mop head, ensuring it is securely attached.
- Folje wettertank:
- Iepenje de wettertank dop.
- Using the provided measuring cup, fill the water tank with up to 380 ml of distilled or demineralized water. Do not overfill.
- Slút de dop fan de wettertank feilich.
- Optional: Attach Carpet Glider: For refreshing carpets, place the mop head with the attached cleaning pad into the carpet glider frame.
4. Bedriuwsinstruksjes
4.1. Using as a Steam Mop
- Soargje derfoar dat de wettertank fol is en dat in skjinmaakdoekje derop oanbrocht is.
- Plug the power cord into a grounded electrical outlet (220-240 V AC, 50 Hz).
- The steam mop will begin heating. The indicator light will illuminate, signaling preparation. The device is ready in approximately 25 seconds.
- Select the desired steam level (3 levels available) using the control button.
- Begin cleaning by moving the mop head slowly and steadily over the floor surface. The swivel head allows for easy maneuverability.
- For carpet refreshing, ensure the carpet glider is attached and move the mop over the carpet.
- When finished, unplug the appliance and allow it to cool before emptying any remaining water and cleaning.
4.2. Using as a Handheld Steam Cleaner
- Unplug the steam mop and ensure it is cool.
- Press the release button to detach the handheld steam unit from the main body (refer to Figure 2.4).
- Attach the desired accessory (e.g., round brush, slot nozzle, joint accessory, scraper) to the handheld unit using the accessory adapter if needed.
- Fill the water tank if necessary (follow instructions in Section 3.3).
- Plug in the handheld unit. Wait for the indicator light to show it's ready (approx. 25 seconds).
- Rjochtsje de stoom nei it oerflak dat skjinmakke wurde moat. Wês foarsichtich, om't de stoom hjit is.
- After use, unplug the unit and allow it to cool before detaching accessories and storing.
5. Underhâld
Regelmjittich ûnderhâld soarget foar optimale prestaasjes en ferlingt de libbensdoer fan jo stoommop.
- Cleaning Pads: The sponge cloths can be machine washed with mild detergent. Do not use bleach or fabric softeners. Air dry only. Replace pads when they become worn or lose their cleaning effectiveness.
- Watertank leegje: After each use, unplug the appliance and allow it to cool. Empty any remaining water from the tank.
- Eksterieur skjinmeitsje: Feie de bûtenkant fan 'e stoomreiniger ôf mei advertinsjesamp doek. Brûk gjin hurde gemikaliën of abrasive skjinmakkers.
- Avkalking: If you notice a decrease in steam production or mineral residue, descaling may be necessary.
- Mix a solution of 1 part white vinegar to 2 parts water.
- Giet de oplossing yn 'e wettertank.
- Plug in the unit and allow it to heat up.
- Run the unit until half of the solution is used, then unplug and let it sit for 30 minutes.
- Plug it back in and run until the tank is empty.
- Rinse the tank thoroughly with fresh water and run two full tanks of fresh water through the unit to flush out any vinegar residue.
- Opslach: Store the steam mop in a cool, dry place. Wrap the power cord around the designated cord wraps on the handle (refer to Figure 2.2).
6. Probleemoplossing
| Probleem | Mooglike oarsaak | Oplossing |
|---|---|---|
| No steam or low steam. |
|
|
| Water leaking from the mop head. |
|
|
| De dweil glydt net soepel. |
|
|
7. Spesifikaasjes
| Model Number | TSA 5051 |
| Krêft | 1500 W |
| Water Tank Kapasiteit | 380 ml |
| Steam Ejection Rate | 21 / 28 ml/min (3 levels) |
| Heat-up Tiid | Ca. 25 sekonden |
| Streamtafier | 220-240 V AC, 50 Hz |
| Power Cord Lengte | 5 m |
| Gewicht | 3.0 kg (product), 4 kg (package) |
| Ofmjittings ( gearstald ) | 30 x 25 x 110 sm |
8. Garânsje en stipe
For warranty information and customer support, please refer to the warranty card included with your product or visit the official Teesa webside. Bewarje jo bewiis fan oankeap foar alle garânsjeclaims.
For further assistance, you may contact Teesa customer service through their official channels.


