1. Wichtige Safety Ynstruksjes
Lês alle ynstruksjes goed troch foardat jo dit apparaat brûke. It net folgjen fan dizze ynstruksjes kin liede ta elektryske skok, brân of slim persoanlik letsel.
- Net oanreitsje waarme oerflakken. Brûk handgrepen of knoppen.
- Om te beskermjen tsjin elektryske skok, dompelje snoer, stekkers of apparaat net yn wetter of oare floeistof.
- Nauwe tafersjoch is nedich as elk apparaat wurdt brûkt troch of tichtby bern.
- Trek de stekker út it stopkontakt as net yn gebrûk en foar skjinmeitsjen. Lit ôfkuolje foardat jo dielen oansette of ôfnimme.
- Betsjinje gjin apparaat mei in skansearre snoer of stekker of neidat it apparaat defekt is of op ien of oare manier skansearre is.
- It brûken fan aksessoires taheaksels net oanrikkemandearre troch de fabrikant fan it apparaat kin feroarsaakje blessueres.
- Brûk net bûten.
- Lit it snoer net oer de râne fan tafel of oanrjocht hingje, of oanreitsje waarme oerflakken.
- Net pleatse op of tichtby in heule gas- of elektryske burner, of yn in ferwaarme oven.
- Ekstreem foarsichtich moat brûkt wurde by it ferpleatsen fan in apparaat dat hjitte oalje of oare hjitte floeistoffen befettet.
- Stek de stekker altyd earst yn it apparaat, en stek dan it snoer yn it stopkontakt. Om de stekker los te meitsjen, set in knop op "út" en helje dan de stekker út it stopkontakt.
- Brûk it apparaat net foar oars as bedoeld gebrûk.
- Oversized iten of metalen gebrûksfoarwerpen moatte net ynfoege wurde yn in broodrooster oven as se kinne meitsje in fjoer of risiko fan elektryske skok.
- In brân kin foarkomme as de oven is bedutsen of oanrekke flammable materiaal, ynklusyf gerdinen, draperies, muorren, en sa, doe't yn wurking.
- Doch gjin oare materialen as de troch de fabrikant oanrikkemandearre accessoires yn dizze oven as er net yn gebrûk is.
- Doch gjin fan 'e folgjende materialen yn 'e oven: papier, karton, plestik of ferlykbere materialen.
- Dek de krummelbak of in diel fan 'e oven net mei metalen folie. Dit sil oerverhitting fan 'e oven feroarsaakje.
2. Produkt Overview
This 22L tabletop electric mini oven is designed for household baking and toasting. It features adjustable temperature control, a 120-minute timer, and a three-layer baking position for versatile cooking.

figuer 1: Front view of the 22L Tabletop Electric Mini Oven with food cooking inside.

Figure 2: Dimensions of the oven: 421mm (width), 252mm (depth), 273mm (height).
3. Opsette
3.1 Útpakke
- Helje de oven en alle ferpakkingsmaterialen foarsichtich út 'e doaze.
- Remove any protective films or stickers from the oven surfaces.
- Kontrolearje op skea tidens it ferfier. As it skansearre is, brûk it dan net en nim kontakt op mei de klanttsjinst.
3.2 Pleatsing
- Plak de oven op in stabyl, flak, hjittebestindich oerflak.
- Ensure there is adequate ventilation around the oven (at least 10 cm clearance on all sides).
- Plak de oven net tichtby brânbere materialen lykas gerdinen of muorren.
- Soargje derfoar dat it stroomkabel net blokkearre of knypt is.
3.3 Foar it earste gebrûk
- Wash the baking tray, wire rack, and crumb tray in warm, soapy water. Rinse and dry thoroughly.
- Wiskje it ynterieur en eksterieur fan 'e oven mei adamp doek.
- To eliminate any manufacturing odors, operate the oven empty for approximately 15 minutes at 200°C (400°F). Ensure the area is well-ventilated during this process.
4. Bedriuwsinstruksjes
4.1 kontrôles oerview
The oven features three mechanical control knobs:
- Boppeste knop: Temperature Control (0-250°C)
- Middelste knop: Function Selector (Controls upper/lower heating elements)
- Knop ûnder: Timer (0-120 minuten)

Figure 3: Temperature control knob, adjustable from 70°C to 250°C.

Figure 4: Timer knob, adjustable from 0 to 120 minutes.
4.2 Preheating the Oven
- Place the wire rack or baking tray in the desired position.
- Draai de knop foar temperatuerkontrôle nei de winske temperatuer.
- Turn the Timer knob to the desired preheating time (e.g., 10-15 minutes). The power indicator light will illuminate.
- Once the preheating time has elapsed, the oven is ready for use.
4.3 Baking and Roasting
This oven offers three-layer baking positions and independent temperature control for upper and lower heating tubes.

Figure 5: The 22L capacity oven features three distinct baking positions for versatile cooking.
- Preheat the oven as described above.
- Carefully place your food on the baking tray or wire rack into the desired baking position. Use oven mitts.
- Select the appropriate temperature using the Temperature Control knob (0-250°C).
- Use the Function Selector knob to choose between upper heating, lower heating, or simultaneous upper and lower heating, depending on your recipe's requirements. This allows for precise control over browning and cooking.
- Set the cooking time using the Timer knob (0-120 minutes). The oven will automatically shut off and ring a bell when the timer expires.
- Monitor food through the wide view finster.

Figuer 6: De brede viewing window allows for easy monitoring of food changes during cooking.
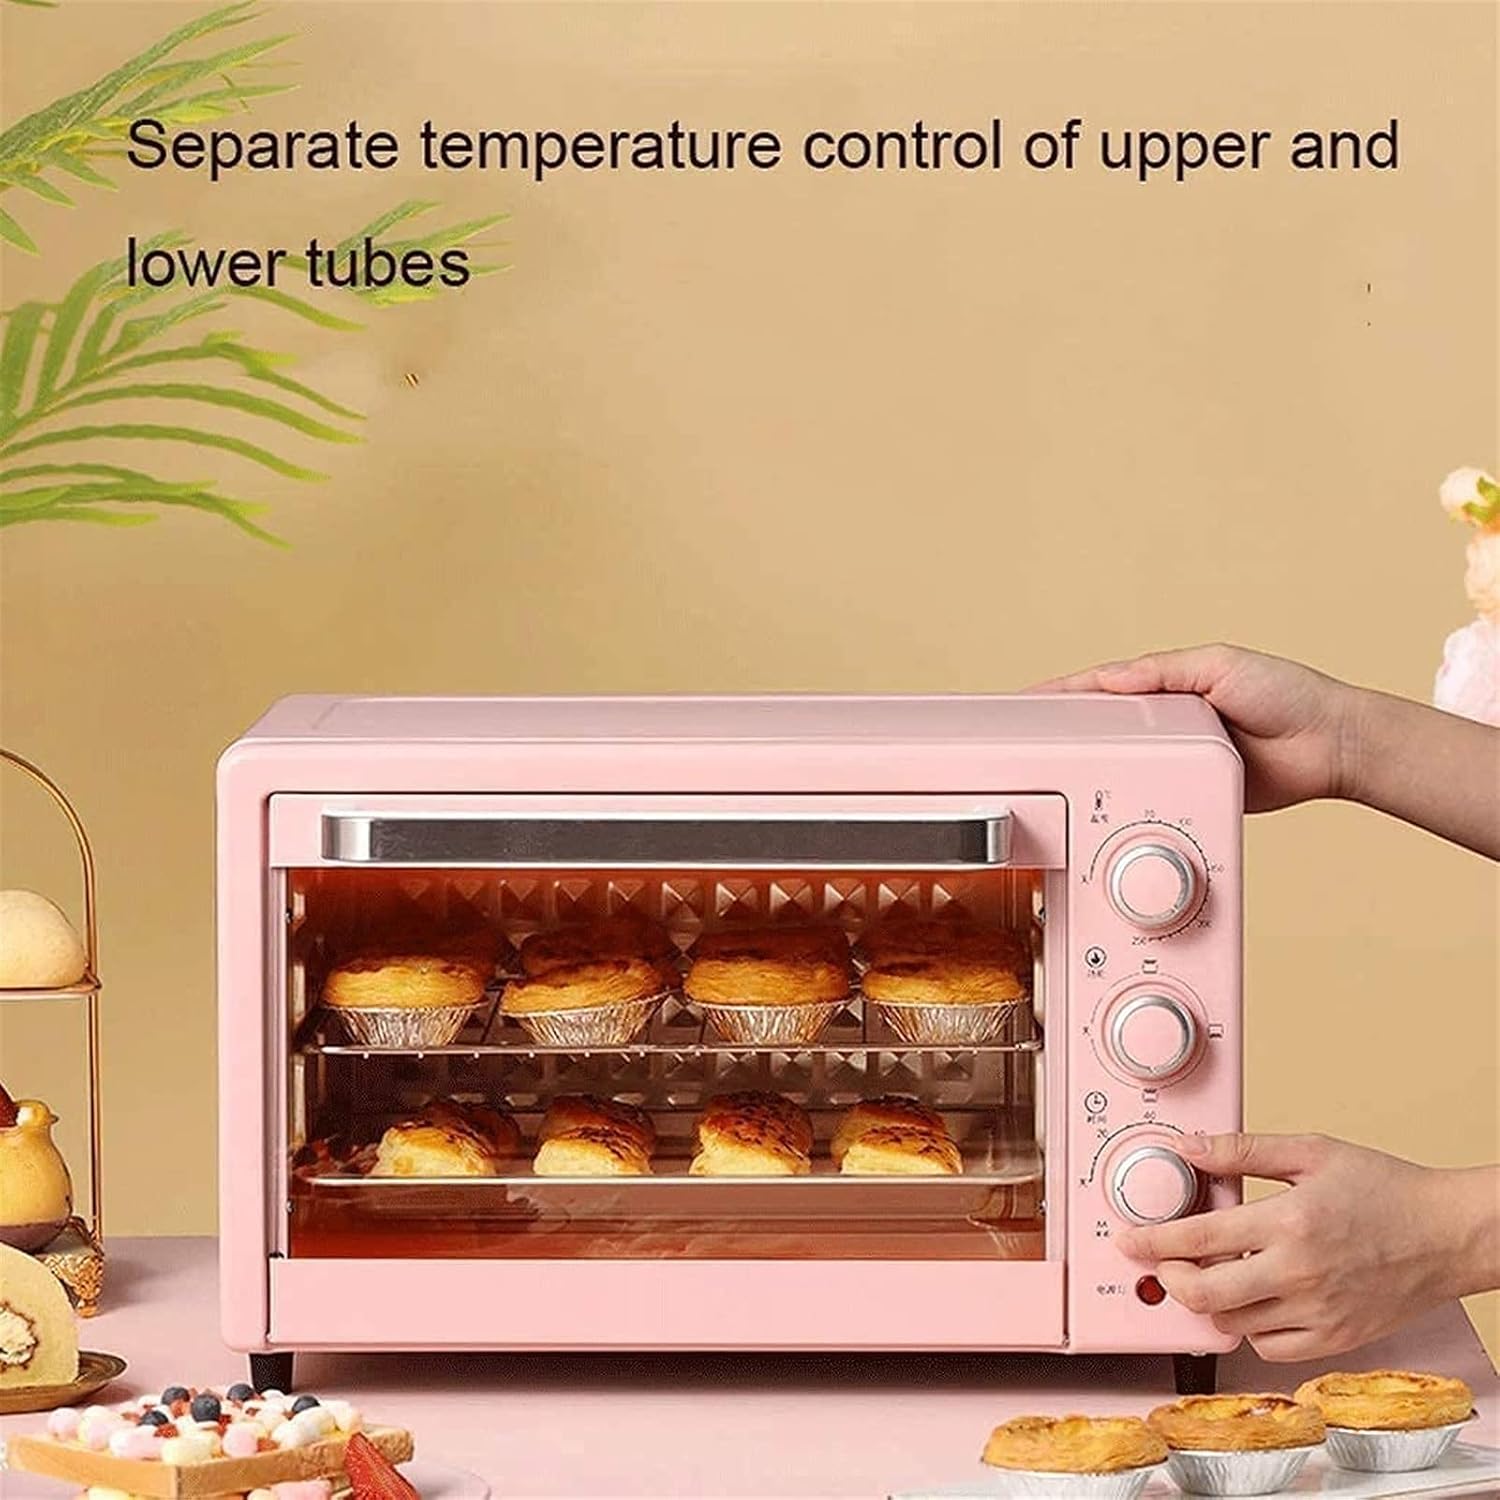
Figure 7: The oven features separate temperature control for upper and lower heating tubes, enabling precise cooking.
5. Underhâld en Cleaning
5.1 Algemiene Cleaning
- Doch de stekker fan 'e oven altyd út it stopkontakt en lit him folslein ôfkuolje foardat jo him skjinmeitsje.
- Dompelje de ovenbehuizing, it snoer of de stekker net ûnder yn wetter of oare floeistof.
- Wiskje de bûtenkant mei adamp doek en myld detergent. Brûk gjin abrasive skjinmakkers of skuurpads.
5.2 Cleaning Interior and Accessories
- Remove the baking tray, wire rack, and crumb tray. Wash them in warm, soapy water. For stubborn stains, soak them before cleaning.
- The interior walls can be wiped with a damp cloth and mild detergent. Avoid touching the heating elements.
- Ensure all parts are thoroughly dry before reassembling and storing the oven.

Figure 8: The oven door features a three-layer safety explosion-proof glass for enhanced durability and safety, including a transparent layer, tempered glass layer, and oil-proof cleaning layer.
6. Probleemoplossing
If you encounter any issues with your oven, please refer to the following common problems and solutions:
- De oven giet net oan:
- Soargje derfoar dat it netsnoer goed yn in wurkjend stopkontakt sit.
- Check if the timer knob is set to a cooking duration. The oven will not operate if the timer is at "OFF" or "0".
- Kontrolearje dat de stroomûnderbrekker net útskeakele is.
- It iten wurdt net evenredich gaarmakke:
- Ensure the oven is preheated to the correct temperature.
- Check that the correct heating function (upper, lower, or both) is selected for your recipe.
- Rotate food halfway through cooking for more even results.
- Ensure there is adequate space around the food for heat circulation.
- Rook of ûngewoane geur by it earste gebrûk:
- This is normal during the initial use as manufacturing oils burn off. Ensure good ventilation. If it persists after the first few uses, discontinue use and contact support.
7. Spesifikaasjes
| Eigenskip | Spesifikaasje |
|---|---|
| Model | 22L mini oven |
| Kapasiteit | 22 liter |
| Rated Voltage | 110V-240V/50Hz |
| Rated Power | 1300W |
| Temperatuerberik | 0-250°C (Controllable) |
| Baktimer | 0-120 Minutes with Bell Ring and Auto Shut Off |
| Materiaal fan ferwaarmingsbuis | Stainless Steel (4 tubes) |
| Liner Materiaal | Galvanisearre plaat |
| Control Metoade | Mechanyske knoppen |
| Ofmjittings (B × D × H) | 421 mm × 252 mm × 273 mm |
| Door Style | Dropdown doar |
8. Garânsje en stipe
8.1 Limited Warranty
This product comes with a limited warranty against defects in materials and workmanship. Please refer to the warranty card included with your purchase or contact the retailer for specific warranty terms and conditions. Keep your proof of purchase for warranty claims.
8.2 Customer Support
For technical assistance, troubleshooting, or parts replacement, please contact the retailer where you purchased the product. If purchased directly from the manufacturer, refer to the contact information provided in your packaging or on their official website.